 Pin it
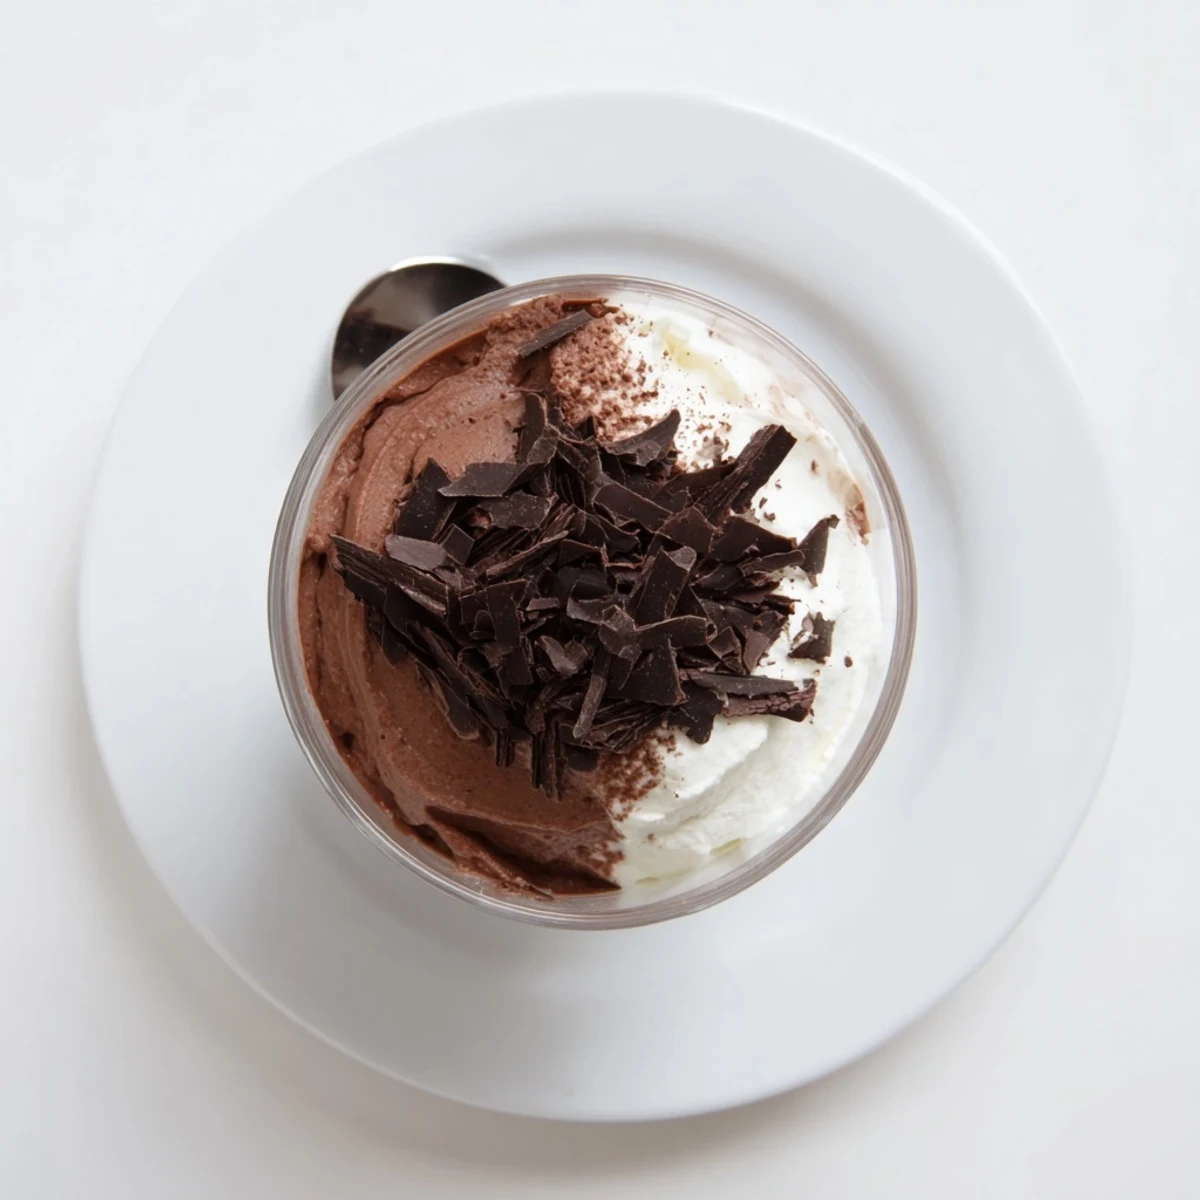
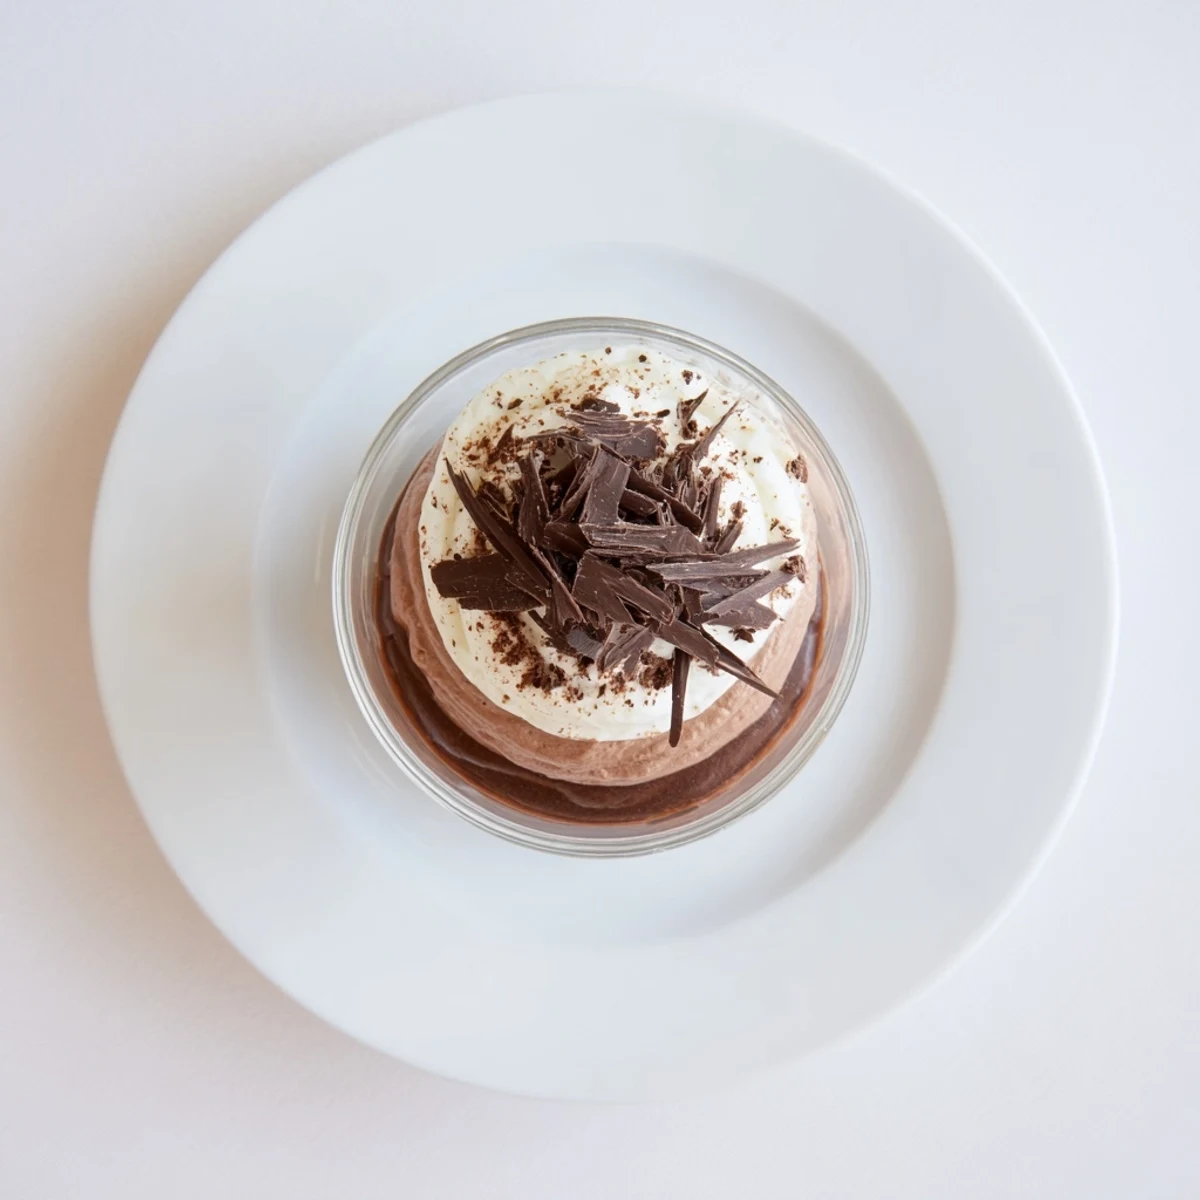
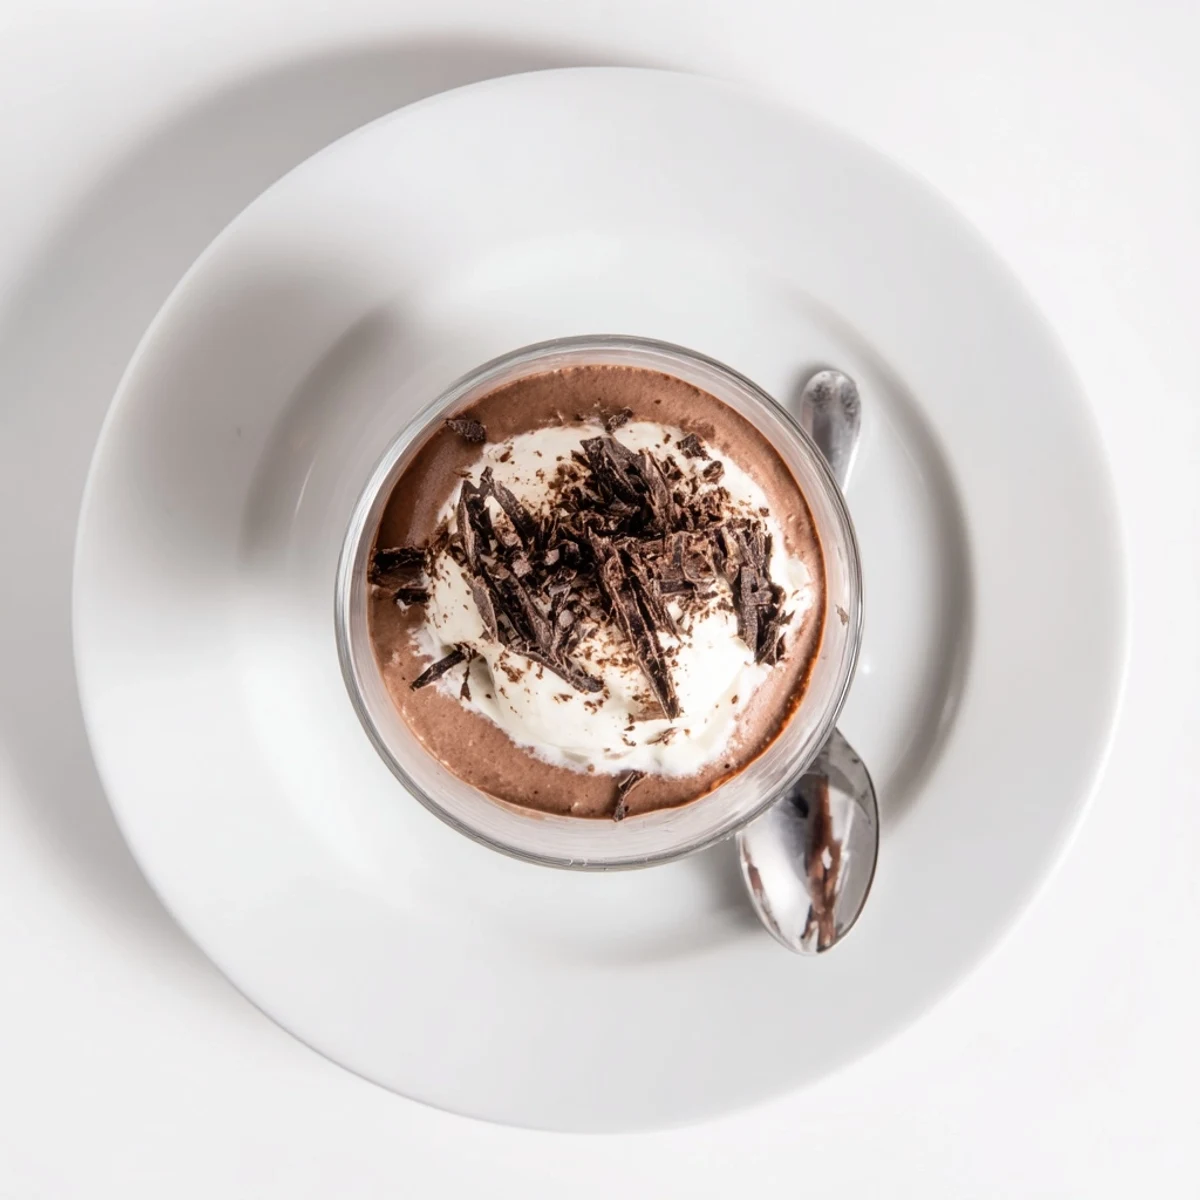
 Three distinct mousses—dark, milk and white—are made by melting chocolate, whisking an egg yolk with sugar, folding in slightly cooled chocolate, then folding in whipped heavy cream. Spoon each mousse into cups in layers, chilling between additions until set. Garnish with shaved chocolate or cocoa. Optionally add a splash of coffee liqueur to the dark layer or freeze briefly to speed setting.
One quiet Saturday, I found myself craving something truly special to end the week, and the idea of layering three types of chocolate into one silky, stunning cup wouldn’t let me go. I still remember the atmosphere: the subtle hum of the fridge, melting chocolate perfuming the kitchen, and music drifting softly from another room. As I worked with each chocolate in turn, I realized this dessert would be an event in itself, not just a sweet finish. There’s a certain thrill in seeing those striped layers come together, both a feast for the eyes and the spoon.
Once, I brought these mousse cups to a friend's birthday potluck, nervously nudging them onto the dessert table beside a forest of cupcakes. The moment someone dipped in and snapped a photo of those layers, everyone crowded around, curious and delighted. Even the chocolate skeptics were tempted by those gleaming ribbons. That day, I learned how a dessert can spark conversation and laughter among friends.
Ingredients
- Dark chocolate (100 g, min 60% cocoa): Go for quality bars, not chips, as the depth of flavor here is incredible; break it up small for smooth melting.
- Large egg yolks (3 total): Egg yolks are the backbone, bringing richness and that luscious mousse structure (keep whites aside for another recipe).
- Sugar (4.5 tbsp total): Granulated sugar balances the bitter-dark, sweet-milk, and creamy-white layers perfectly; measure with a gentle hand for even sweetness.
- Heavy cream (300 ml, cold): Chill the bowl and whisk for extra-fluffy clouds when whipping, which keeps your mousses dreamy and light.
- Milk chocolate (100 g): Choose one with at least 30 percent cocoa solids for a creamy, not-too-sweet layer that kids and grownups both love.
- White chocolate (100 g): This layer is your sweet, gentle finale; melt slowly, as white chocolate can seize easily.
- Shaved chocolate or cocoa powder (optional): For drama and texture, a little sprinkle on top is worth the effort.
Instructions
- Start with dark chocolate:
- Melt it gently over a bain-marie or in a microwave in short bursts, stirring until glossy and smooth.
- Mix the base:
- Vigorously whisk the egg yolk with sugar until pale – you’ll see it lighten like morning sun, then fold in the melted chocolate, working quickly but gently so nothing seizes.
- Add cream:
- Whip cream until soft peaks peek from your whisk, then carefully fold into the chocolate mixture; spoon into the base of serving cups and chill.
- Layer the milk chocolate mousse:
- Repeat the dark chocolate process with milk chocolate, egg yolk, sugar, and cream; check the dark layer is softly set before spooning this over – an angled spoon helps keep things neat.
- Top with white chocolate mousse:
- Again, repeat the mousse steps, melting white chocolate slowly and watching it closely; spoon this last layer on top and smooth lightly for pretty, distinct stripes.
- Chill and garnish:
- Refrigerate all cups for at least one hour, then just before serving, add chocolate shavings or a dusting of cocoa powder to finish with a flourish.
 Pin it
 There was an evening when, after a too-long workday, these mousse cups were waiting for us—cold, creamy, and unapologetically extravagant. My housemate and I ate them straight from the fridge, standing barefoot by the counter, barely talking except to murmur about how good they were. In that quiet, our laughter melted away all the stress, proving that sometimes dessert does more than just fill a craving. It sweetened the whole mood of the night.
What Makes Each Layer Special
I used to think chocolate mousse was just one-note, but working through each layer taught me how their personalities shine. The dark chocolate is robust and satisfying – it sets the stage. Milk chocolate brings a familiar comfort, while the white is light, almost like a cloud, softening the finish. You’ll notice that the flavor journey in one spoonful is what turns this dessert from simple to unforgettable.
A Trick for Perfect Layers
Here’s a kitchen discovery: If you spoon each layer against the inside wall of your cup at an angle, you get elegant, sharp lines without the colors blurring together. Don’t fret about perfection—minor ripples give each serving its one-of-a-kind signature. If your mousse is too runny, let it chill a few more minutes before layering. That pause always helps the chocolate speak for itself.
Little Extras That Make a Big Difference
One day I swapped in a hint of coffee liqueur for the dark chocolate mousse—it quietly elevated everything, as if the dessert dressed up for a night out. Using clear glass cups turns these into showstoppers; the layers beg to be admired before the first bite. And who can resist a flurry of chocolate shavings on top at the last second?
- Keep mousse chilled right until serving so it stays perfectly airy.
- A wet spoon smooths out the top layer for a professional look.
- Play with garnishes – a tiny pinch of sea salt or orange zest adds a surprise.
 Pin it
 Whether shared at a party or simply enjoyed in quiet, these triple chocolate mousse cups are little moments of luxury. Here’s to treating yourself and those around you to something as beautiful as it is delicious.
Recipe FAQs
- → How do I keep the mousses light yet stable?
-
Use cold heavy cream and whip to soft peaks, cool melted chocolate before folding, and fold gently to preserve air. Avoid overmixing to keep the texture airy while still holding shape.
- → Can these be prepared ahead of time?
-
Yes. Assemble the layers and chill the cups covered for several hours or overnight. Add shaved chocolate or cocoa just before serving to retain a fresh finish.
- → What can I use instead of egg yolks?
-
For an egg-free approach, stabilize whipped cream with dissolved gelatin (bloomed and warmed) or use aquafaba whipped to soft peaks for a lighter, vegan-friendly alternative.
- → How can I speed up set times between layers?
-
Chill the cups in the freezer for 25–30 minutes between layers to accelerate setting, then transfer to the refrigerator for final chilling to avoid freezing the texture solid.
- → What type of chocolate yields the best results?
-
Choose good-quality bars: a 60%+ cocoa dark chocolate for depth, a creamy milk chocolate for balance, and a high-quality white chocolate that melts smoothly for the top layer.
- → Is it okay to add alcohol for extra flavor?
-
Yes. A small splash of coffee liqueur in the dark layer complements the cocoa. Add sparingly so the mousse keeps a balanced texture and sweetness.
