 Pin it
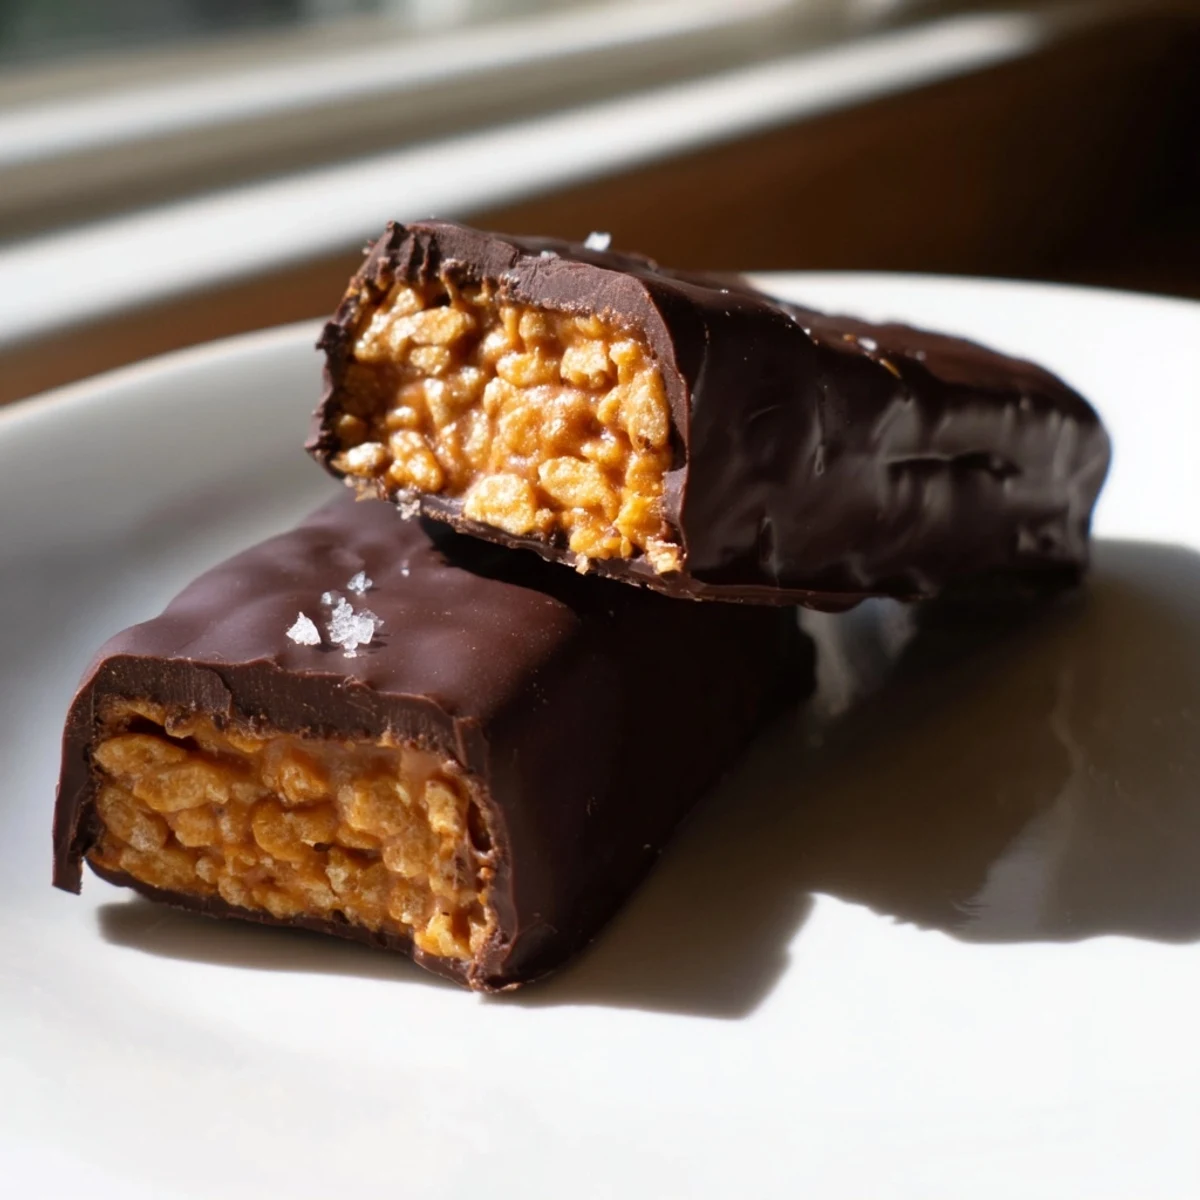
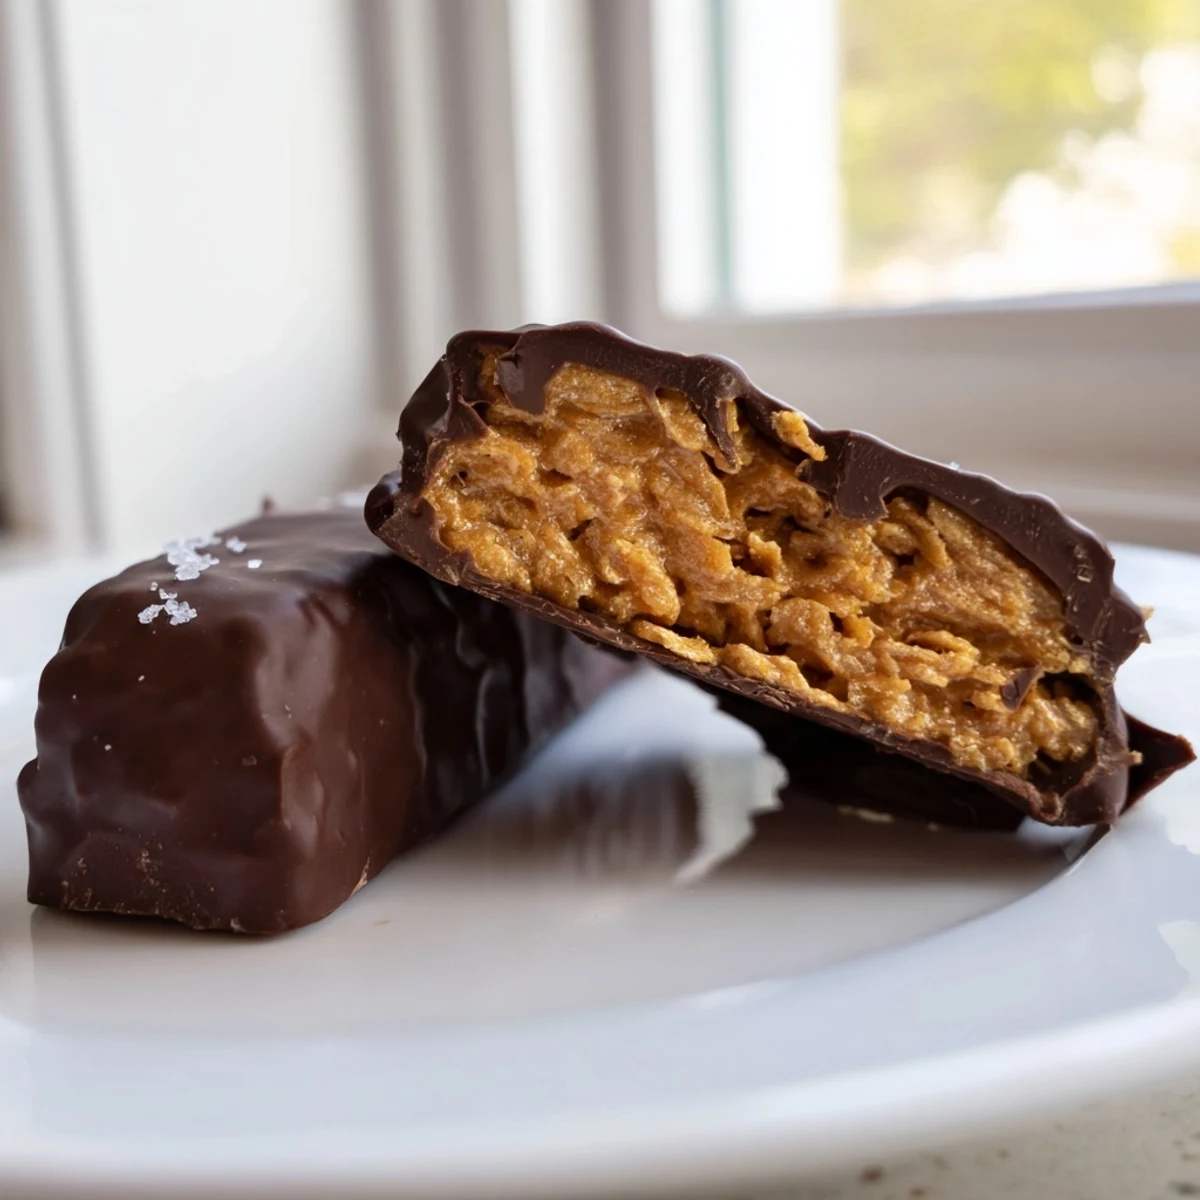
 These healthy homemade Butterfingers combine a crunchy peanut butter and corn flake center with a smooth dark chocolate coating. Ready in about an hour, they use just five wholesome ingredients—natural peanut butter, maple syrup, corn flakes, dark chocolate, and coconut oil.
Each bar delivers that signature crispy-crunchy texture and sweet-salty flavor you love, but with better-for-you ingredients. They're vegetarian, naturally gluten-free, and easy to make vegan by choosing dairy-free chocolate and maple syrup.
Perfect for meal prep, after-school snacks, or whenever a candy bar craving hits. Store them in the fridge for up to a week or freeze for longer enjoyment.
The candy aisle at the grocery store always gets me, especially around Halloween when those orange and yellow wrappers are stacked like tiny bricks of temptation. One rainy Tuesday evening, instead of giving in, I drove home empty handed and started tossing peanut butter and corn flakes into a saucepan with zero plan beyond craving something crunchy and chocolate drenched. What came out of the freezer an hour later was so shockingly close to the real thing that my husband thought I had smuggled a bag of candy bars past him. That random weeknight experiment turned into the most requested treat in our house.
I brought a batch of these to a friends potluck last fall and watched a normally restrained guest eat four bars before dinner was even served. She cornered me in the kitchen demanding the recipe and I had to admit the whole thing takes less active time than brewing a pot of coffee.
Ingredients
- Natural creamy peanut butter (1 cup): Use the kind with just peanuts and salt on the label because the stabilized stuff leaves a waxy film that ruins the texture.
- Pure maple syrup or honey (1/2 cup): Maple syrup keeps it vegan and adds a rounder sweetness but honey works beautifully if that is what you have.
- Corn flakes, lightly crushed (2 cups): Do not pulverize them into dust because you want recognizable flakes for that signature snap when you bite in.
- Dark chocolate chips, at least 70% cacao (1 1/2 cups): The higher percentage balances the sweet filling and makes the whole thing taste like grown up candy.
- Coconut oil (1 tablespoon): This tiny addition thins the chocolate into a glossy shell that snaps when it sets instead of staying soft and tacky.
Instructions
- Prep the pan:
- Tear off a sheet of parchment paper and press it into an 8x8 inch baking dish so it comes up the sides like a little hammock. This saves you from chiseling candy off glass later which is a mistake you only make once.
- Melt the filling:
- Set a saucepan over low heat and stir the peanut butter and maple syrup together until they melt into one smooth golden pool. Keep the heat low and your spoon moving because scorched peanut butter tastes bitter and there is no fixing it.
- Fold in the crunch:
- Pull the pan off the heat and gently tumble in the crushed corn flakes with a spatula. Fold rather than stir so you do not break the flakes down too much before they even hit the pan.
- Press and freeze:
- Transfer the sticky mixture into your lined dish and press it down firmly with the back of a spoon or your palms. Slide it into the freezer for 20 to 30 minutes until it holds its shape when you press it with a finger.
- Melt the chocolate:
- Set a heatproof bowl over a pan of barely simmering water and add the chocolate chips plus coconut oil. Stir gently until the mixture is completely smooth and shiny with no stubborn lumps remaining.
- Cut and dip:
- Lift the frozen peanut butter slab out of the dish and cut it into 12 even bars using a sharp knife. Spear each bar with a fork and lower it into the chocolate, flipping once to coat all sides before tapping off the excess.
- Set the shells:
- Arrange the dipped bars on a clean parchment lined tray and tuck the whole thing into the refrigerator for at least 20 minutes. The chocolate should be firm to the touch and give a clean snap when you break a corner off to test it.
 Pin it
 There is something quietly powerful about handing someone a homemade candy bar that looks like it came from a boutique chocolate shop. These little bars have a way of turning ordinary afternoons into small celebrations.
Swaps and Substitutions
Almond butter works just as well if peanuts are off the table and sunflower seed butter makes a school safe version that kids devour without asking questions. For a fully vegan batch, stick with maple syrup and double check that your chocolate chips do not contain milk fat. I once used Rice Krispies instead of corn flakes in a pinch and the bars were still delicious, just a slightly softer crunch.
Storing Your Candy Bars
Keep them in an airtight container in the refrigerator and they stay perfect for up to a week, though they rarely last that long in my house. You can also freeze them layered between sheets of parchment for up to three months and pull out one at a time when the craving hits.
Getting the Coating Right
The double boiler method is foolproof but if you are confident with a microwave, heat the chocolate in 20 second bursts stirring between each round. Whatever method you choose, make sure the chocolate is smooth and pourable, not thick and gloppy. A few small things make a big difference here.
- Pat the frozen bars dry before dipping because condensation makes chocolate seize.
- Work quickly once the bars come out of the freezer so the peanut butter layer does not soften.
- Sprinkle flaky sea salt on top right after dipping while the chocolate is still wet.
 Pin it
 Every time I make these, I feel like I have cracked some secret code between indulgence and simplicity. Share them with someone you love or hoard the whole batch in the back of the fridge, I will never tell.
Recipe FAQs
- → Can I make these Butterfingers vegan?
-
Yes, use maple syrup instead of honey and choose dairy-free dark chocolate chips. Most dark chocolate with 70% cacao or higher is naturally dairy-free, but always check the label to be sure.
- → What can I substitute for peanut butter?
-
Almond butter, sunflower seed butter, or cashew butter all work well. Sunflower seed butter is a great nut-free option for school-friendly snacks. The texture may vary slightly depending on the butter you choose.
- → How should I store the finished bars?
-
Keep bars in an airtight container in the refrigerator for up to one week. For longer storage, freeze them for up to three months. Let frozen bars thaw at room temperature for about 10 minutes before enjoying.
- → Why do my corn flakes get soggy?
-
Make sure to fold the corn flakes in quickly after removing the peanut butter mixture from heat, and press the mixture into the dish immediately. Work swiftly—delayed handling allows moisture to soften the flakes. Lightly crushing them also helps maintain crunch.
- → Can I use milk chocolate instead of dark chocolate?
-
Absolutely. Milk chocolate or semi-sweet chocolate chips work fine for the coating. Dark chocolate (70% cacao or higher) adds a richer flavor that balances the sweetness, but use whatever you prefer.
- → Are these bars gluten-free?
-
They can be. Use certified gluten-free corn flakes to ensure the dish is completely gluten-free. All other ingredients are naturally gluten-free, but the corn flakes are the one to watch since some brands process them with wheat.
