 Pin it
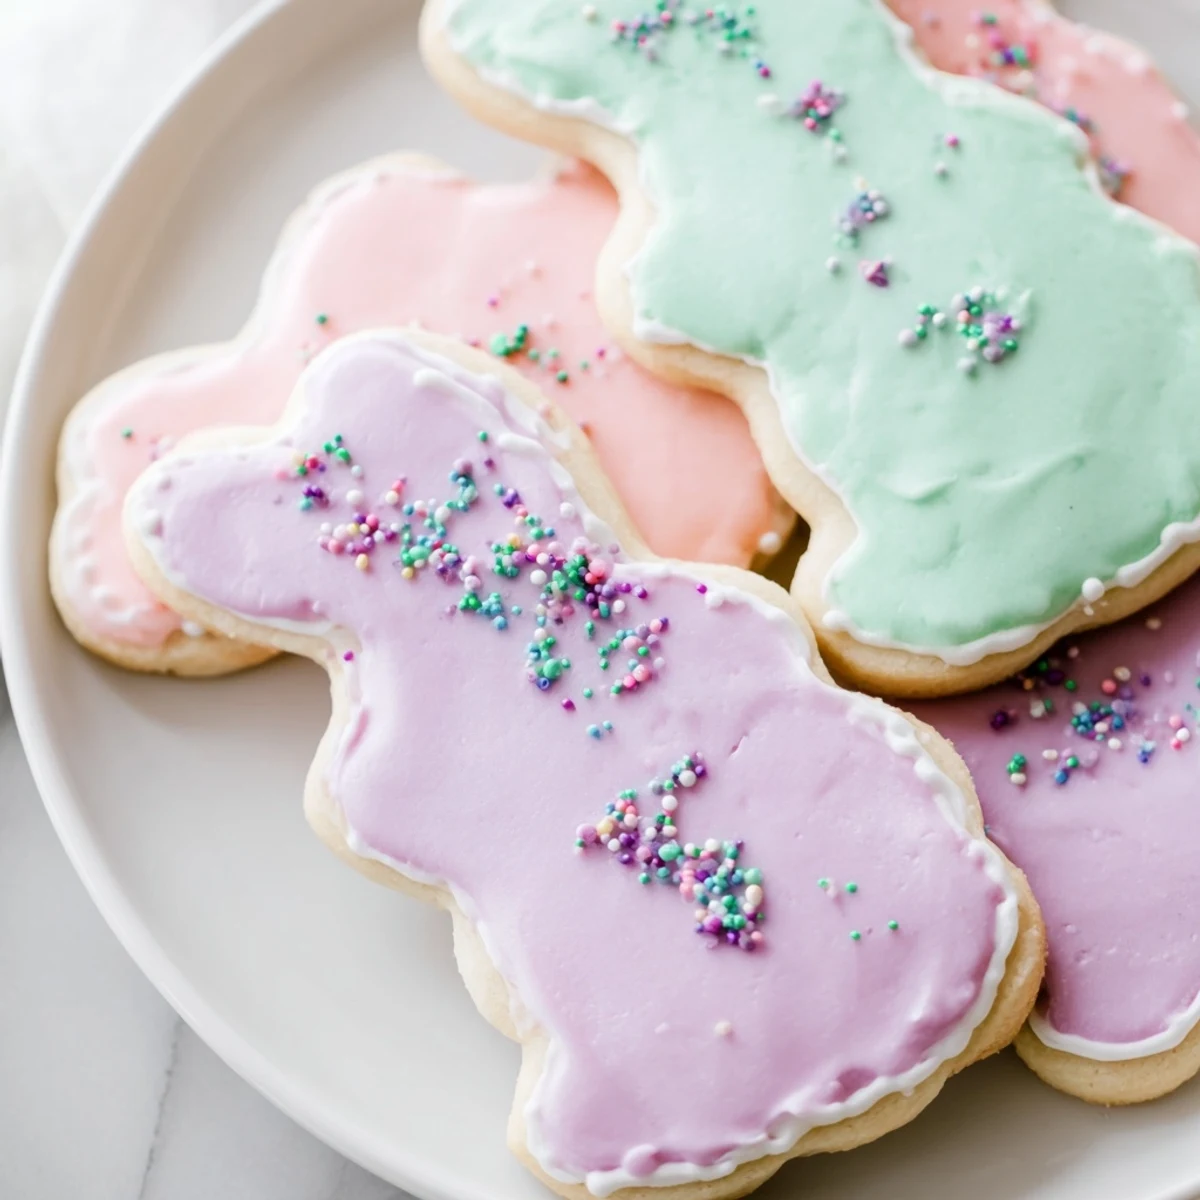
 Enjoy soft, buttery sugar cookies crafted into charming Easter bunny shapes. Made with simple ingredients like flour, butter, sugar, and vanilla, these treats cool to a tender finish.
After chilling the dough, cut the bunny figures and bake to golden edges. Once cooled, add a smooth vanilla glaze, optionally tinted, and decorate with sprinkles for a festive touch perfect for family gatherings.
My kitchen counter looked like a confetti explosion after my daughter and I decorated four dozen bunny cookies last April. She insisted every bunny needed pink ears and a cotton tail, which meant I spent twenty minutes picking sprinkles out of the grout later that evening. That afternoon chaos became our new spring tradition, one we look forward to more than the actual egg hunt.
Last year my neighbor stopped by while we were mid frosting, dripping blue icing all over her kitchen island. She ended up staying for three hours, and we both had flour in our hair and royal icing on our sleeves by the time her kids came home from school. Sometimes the best holidays start with accidental cookie decorating parties.
Ingredients
- 2 1/2 cups all purpose flour: The foundation of everything, spooned gently into the measuring cup and leveled off for consistent results every time
- 1/2 teaspoon baking powder: Just enough lift to give these cookies their signature soft texture without making them cakey
- 1/4 teaspoon salt: The unsung hero that balances the sweetness and makes all the flavors sing together
- 3/4 cup unsalted butter: Make sure it is properly softened, meaning you can press your finger into it but it still holds its shape
- 1 cup granulated sugar: Cream this thoroughly with the butter for that classic sugar cookie snap and sweetness
- 1 large egg: Room temperature eggs incorporate better into the dough, creating a more uniform texture
- 2 teaspoons pure vanilla extract: Do not skimp here because vanilla is the main flavor that makes these cookies irresistible
- 1 1/2 cups powdered sugar: Sift this first to prevent lumps in your icing that can clog decorating bags
- 2 to 3 tablespoons milk: Start with less and add more gradually until you reach the perfect piping consistency
- 1/2 teaspoon vanilla extract: A little extra vanilla in the frosting takes these cookies from good to absolutely crave worthy
- Food coloring: Gel colors work best because they do not thin out the icing like liquid food coloring can
- Sprinkles or sanding sugar: Have fun with pastels and spring colors that make the bunnies look ready to hop off the plate
Instructions
- Whisk the dry ingredients:
- In a medium bowl, combine flour, baking powder, and salt until everything is evenly distributed
- Cream the butter and sugar:
- Beat the softened butter and granulated sugar for 2 to 3 minutes until the mixture looks pale and fluffy
- Add the egg and vanilla:
- Mix in the egg and vanilla extract until the dough comes together and looks smooth and combined
- Form the dough:
- Gradually stir in the flour mixture until the dough forms, then divide in half and flatten into disks
- Chill the dough:
- Wrap each disk in plastic and refrigerate for at least 30 minutes so the cookies hold their shape
- Prepare for baking:
- Preheat oven to 350 degrees and line baking sheets with parchment paper for easy cleanup
- Roll out the dough:
- On a floured surface, roll one disk to a quarter inch thickness for cookies that are neither too thin nor too thick
- Cut and arrange:
- Use bunny cutters and place cookies an inch apart on the prepared sheets to allow for slight spreading
- Bake to golden:
- Bake for 8 to 10 minutes until edges just start turning golden, then cool on sheets for 5 minutes
- Make the icing:
- Whisk powdered sugar, milk, and vanilla until smooth, then divide and tint if desired
- Decorate your bunnies:
- Once cookies are completely cool, have fun adding icing and sprinkles before letting everything set
 Pin it
 My sister once tried to make these with her preschool class and sent me a photo of 23 children covered in blue icing. The bunnies were barely recognizable, but the kids were so proud that she framed a picture of their bunny masterpieces. Sometimes the imperfect cookies are the ones that become the sweetest memories.
Making the Dough Ahead
You can prepare the dough disks up to three days in advance and keep them wrapped tightly in the refrigerator. When you are ready to bake, let the cold dough sit at room temperature for just 10 minutes before rolling. This trick has saved me more than once when I want fresh baked cookies but do not have time to start from scratch.
Freezing Dough or Cookies
Freeze the uncut dough disks for up to three months, wrapping them first in plastic and then in foil to prevent freezer burn. Already baked and cooled cookies freeze beautifully for two months if layered between sheets of parchment paper in an airtight container. Just thaw at room temperature before decorating or serving.
Decorating Like a Pro
Consistency is everything when it comes to cookie decorating that looks professional and holds its shape. You want icing thick enough to hold its shape when piped but thin enough to spread smoothly, which usually means aiming for the texture of toothpaste.
- Use toothpicks to spread icing into small corners and tricky spots on the bunny shapes
- Add sprinkles immediately after icing while it is still wet so they stick properly
- Let the base layer of icing dry completely before adding details like eyes or whiskers
 Pin it
 There is something wonderfully simple about a sugar cookie that looks like a bunny and tastes like pure happiness. May your kitchen be filled with flour, sprinkles, and laughter this spring.
Recipe FAQs
- → How do I achieve crispier edges?
-
Baking the cookies for an additional minute will enhance crispness, while removing them earlier yields softer textures.
- → Can I decorate with colored icing?
-
Yes, you can tint the icing with food coloring and add sprinkles or sanding sugar for vibrant decorations.
- → What is the best way to roll out the dough?
-
Roll the dough on a lightly floured surface to about 1/4 inch thickness for even baking and well-shaped cutouts.
- → How long should the dough chill before baking?
-
Chill the dough for at least 30 minutes to firm up, which helps maintain shape during baking.
- → What allergen information should I consider?
-
This contains wheat, eggs, and dairy. Verify any food coloring or sprinkles used for additional allergens.
