 Pin it
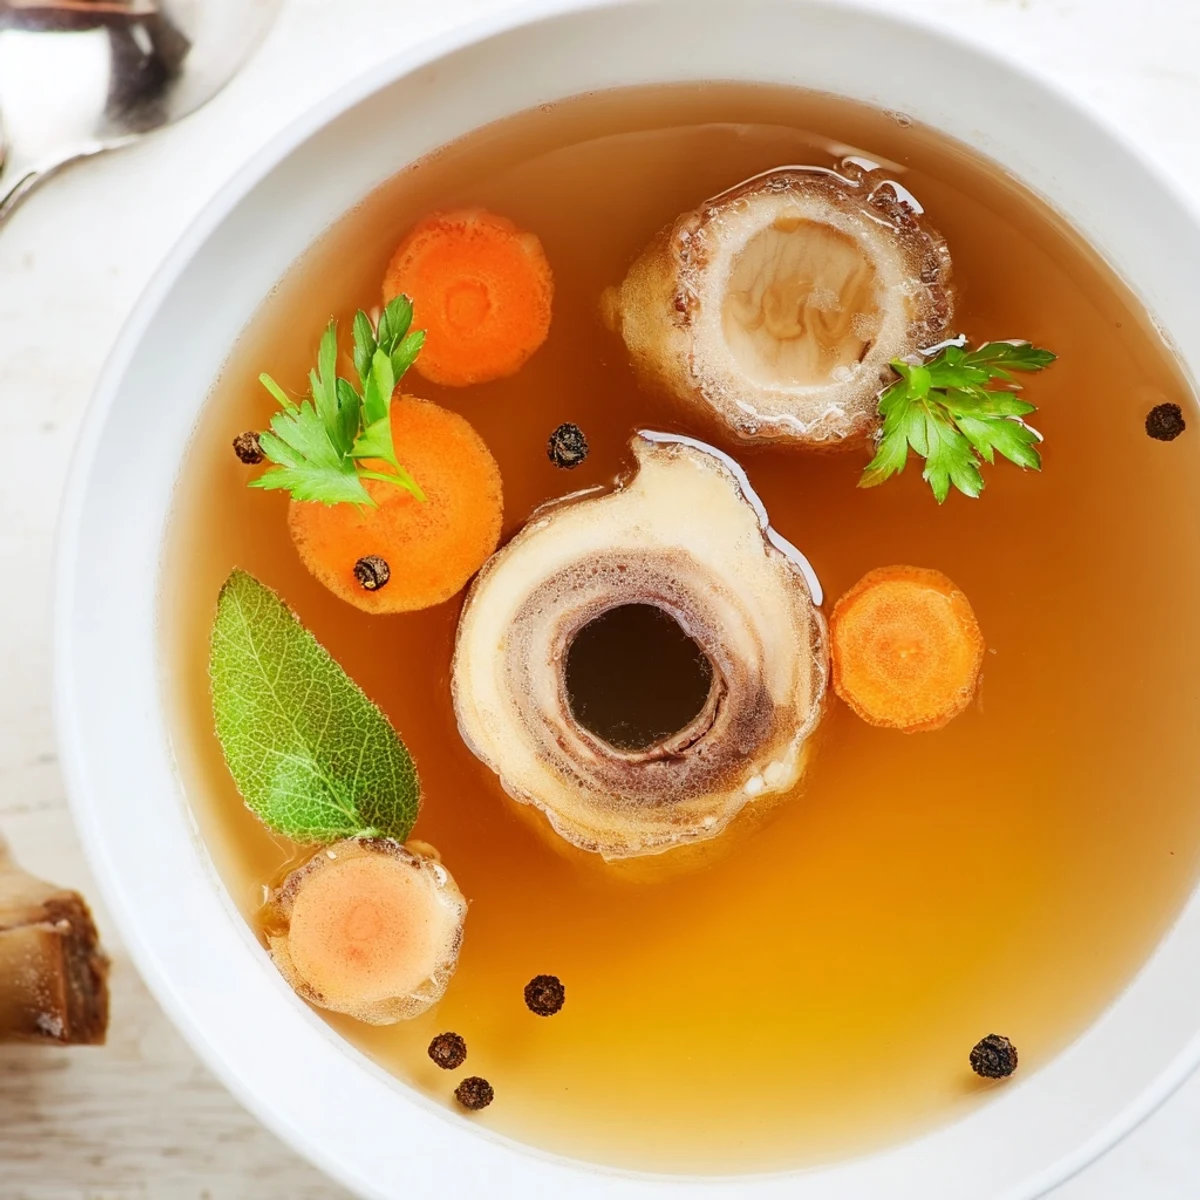
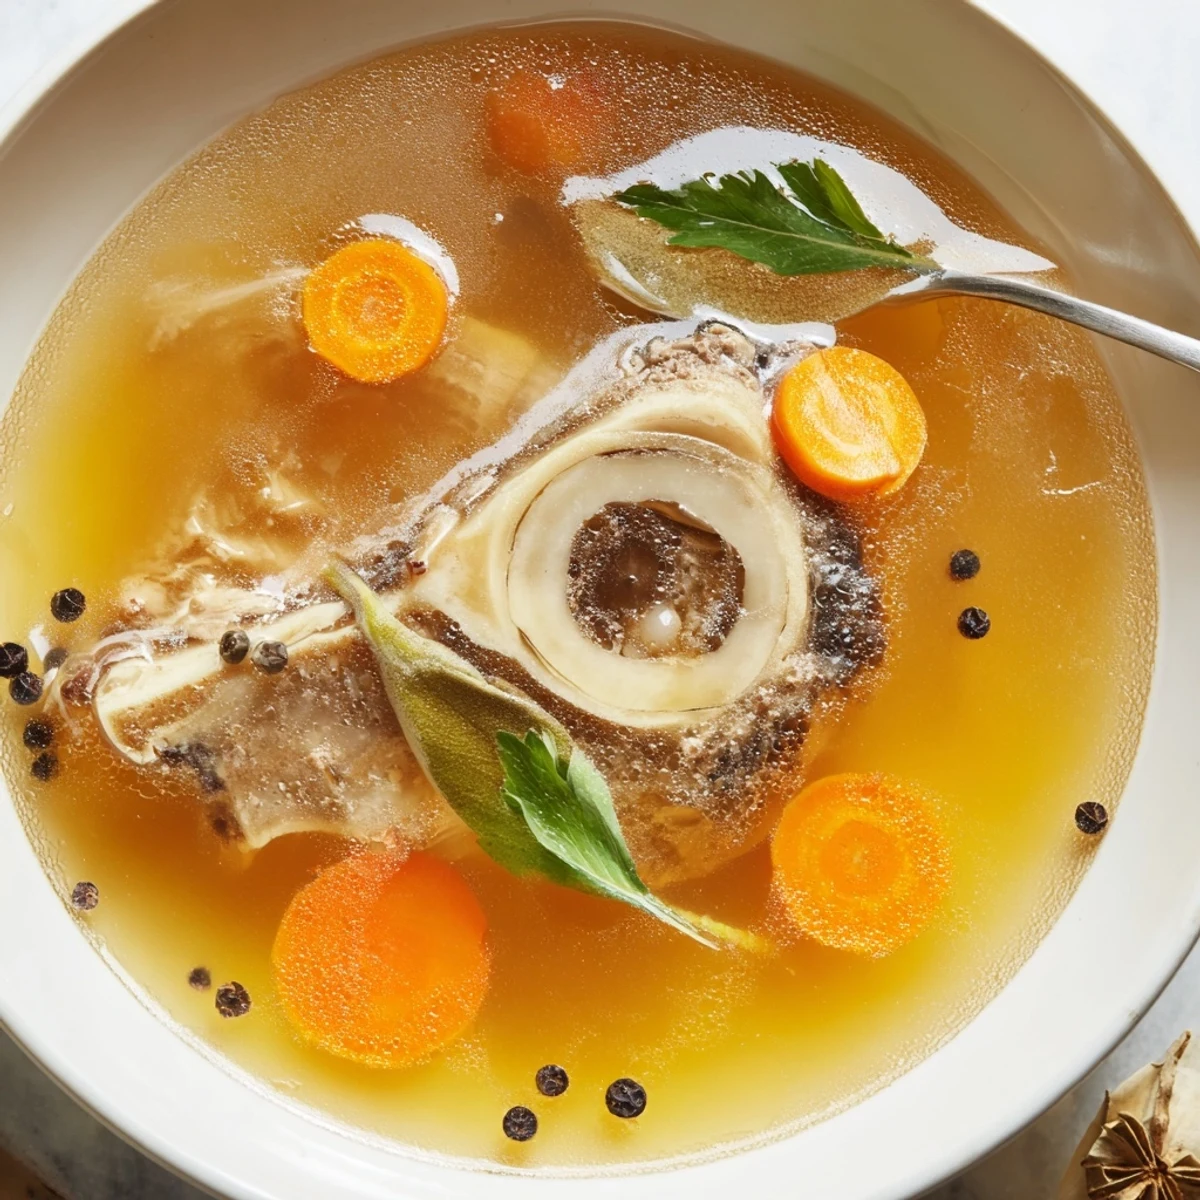
 Make a rich beef bone broth by simmering roasted or raw marrow and knuckle bones with carrots, celery, onion, garlic, parsley, bay leaves, peppercorns and apple cider vinegar. Simmer gently for 12+ hours, skimming impurities, then strain and season. Chill to remove fat; stores refrigerated for 5 days or frozen for 3 months. Longer simmering yields a more gelatinous, flavorful stock.
My kitchen smelled like a farmhouse in winter the weekend I committed to making bone broth from scratch. Twelve hours of low bubbling turned a pile of bones and scraps into something that felt almost magical when I ladled it into a mug and took that first sip. It was the kind of project that makes you slow down and pay attention to what real food actually tastes like.
I started making this regularly after a friend who swears by it told me her secret to surviving cold season was a nightly mug of bone broth. One rainy Sunday I finally tried it, and by evening I was curled up with a steaming cup, wondering why I had waited so long.
Ingredients
- Beef bones (2.5 lbs or 1.1 kg): A mix of marrow, knuckle, and oxtail gives the best balance of flavor and gelatin for a rich, silky texture.
- Carrots (2, roughly chopped): These add a subtle sweetness that rounds out the deep savory notes from the bones.
- Celery stalks (2, roughly chopped): Celery brings a clean earthy base that supports the other aromatics without overpowering them.
- Large onion (1, quartered): Leave the skin on for a deeper golden color in your finished broth.
- Garlic cloves (4, smashed): Smashing rather than mincing lets the garlic infuse gently without turning bitter over the long cook.
- Bay leaves (2): These quietly do heavy lifting in the background, adding complexity you would miss if they were gone.
- Fresh parsley (1 small bunch): Toss it in whole for a fresh herbal lift that keeps the broth from tasting one dimensional.
- Whole black peppercorns (1 tsp): Whole peppercorns give gentle warmth without the harshness of cracked or ground pepper.
- Apple cider vinegar (2 tbsp): This is the trick that helps draw minerals out of the bones and into your broth.
- Cold water (12 cups or 3 liters): Always start with cold water because it extracts more flavor and nutrients from the bones.
- Salt (to taste): Wait until the very end to salt so you can control the seasoning precisely.
Instructions
- Roast the bones:
- If you have the time, spread the bones on a baking sheet and roast at 400 degrees F for about 30 minutes until deeply browned. This step is optional but the caramelization adds a depth you can taste in every sip.
- Build the pot:
- Transfer the bones to a large stockpot or slow cooker and pile in the carrots, celery, onion, garlic, bay leaves, parsley, and peppercorns. Pour the apple cider vinegar over everything, then add the cold water until the bones and vegetables are fully submerged.
- Simmer and skim:
- Bring the pot to a gentle simmer over medium heat and watch for foam rising to the top during the first hour. Skim it off with a ladle as it appears because this is what keeps your broth clear and clean tasting.
- Let time do the work:
- Lower the heat and let it burble away uncovered or partially covered for at least 12 hours, checking now and then to add water if the bones start peeking above the surface. The longer you go, the more gelatin and goodness you pull from those bones.
- Strain and season:
- Pour the broth through a fine mesh sieve or cheesecloth into a large bowl or second pot, discarding all the spent solids. Now season with salt to your liking, tasting as you go until it sings.
- Cool and store:
- Let the broth cool completely, then refrigerate it so the fat solidifies into a solid layer on top that you can easily lift off if you prefer. It keeps in the fridge for up to 5 days or freezes beautifully for up to 3 months.
 Pin it
 I poured some of this broth into a thermos and brought it on a cold hike last fall, and my friends looked at me like I was eccentric until they tried it themselves.
Making It Your Own
Once you have the basic method down, start playing around with aromatics based on what you have on hand. A few sprigs of thyme or rosemary, a leek instead of onion, or a knob of fresh ginger can shift the whole personality of the broth without changing the technique.
The Slow Cooker Shortcut
If watching a pot for 12 hours sounds unreasonable, your slow cooker is the perfect tool for this job. Set it to low, cover it, and let it go overnight or while you are at work, skimming when you first get it going and again when you return.
Serving and Storing
A mug of hot broth with a pinch of salt is one of the most comforting things you can drink on a cold evening. It also transforms any soup, stew, risotto, or pan sauce into something noticeably better than what you would get with boxed stock.
- Freeze in portion sized jars or silicone ice cube trays so you always have small amounts ready for cooking.
- Label your frozen containers with the date so nothing gets lost in the back of the freezer.
- Remember that fat layer on top is your friend and protects the broth underneath from off flavors while stored.
 Pin it
 There is something deeply satisfying about turning humble bones into liquid gold that nourishes you for days. Keep a batch in your freezer and you will always be a few minutes away from something warm and wonderful.
Recipe FAQs
- → Why roast the bones first?
-
Roasting concentrates flavor and darkens the stock, adding depth and caramelized notes. It’s optional but recommended for a richer color and mouthfeel.
- → How long should I simmer the bones?
-
Simmer gently for at least 12 hours; up to 24 hours extracts more collagen and minerals, producing a gelatinous texture when cooled.
- → What does the apple cider vinegar do?
-
Acid helps draw minerals and collagen from the bones into the liquid, improving body and mouthfeel without affecting final acidity when seasoned after cooking.
- → How do I remove excess fat?
-
Chill the cooked stock until the fat solidifies on top, then skim or lift the solidified layer away. Use a spoon or paper towel for small remaining patches.
- → How can I use the finished broth?
-
Enjoy hot on its own as a nourishing drink, or use as a base for soups, stews, risotto, sauces, and braises to add depth and body.
- → How can I make a clearer broth?
-
Skim foam and impurities during the first hour of simmering, avoid a rolling boil, and strain through a fine-mesh sieve or cheesecloth for a cleaner finish.
