 Pin it
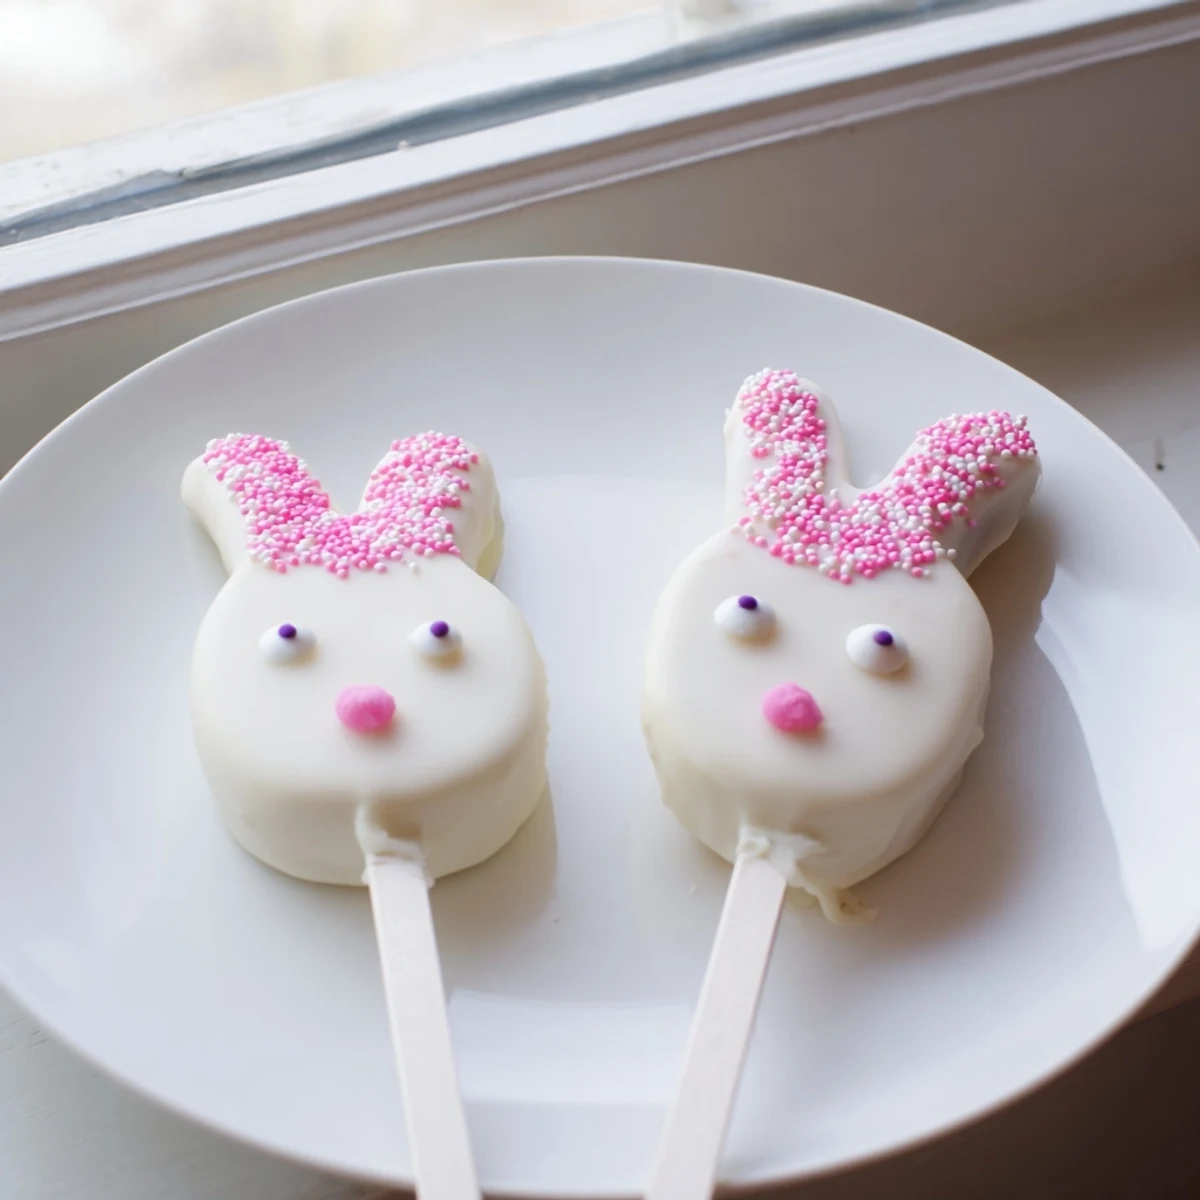
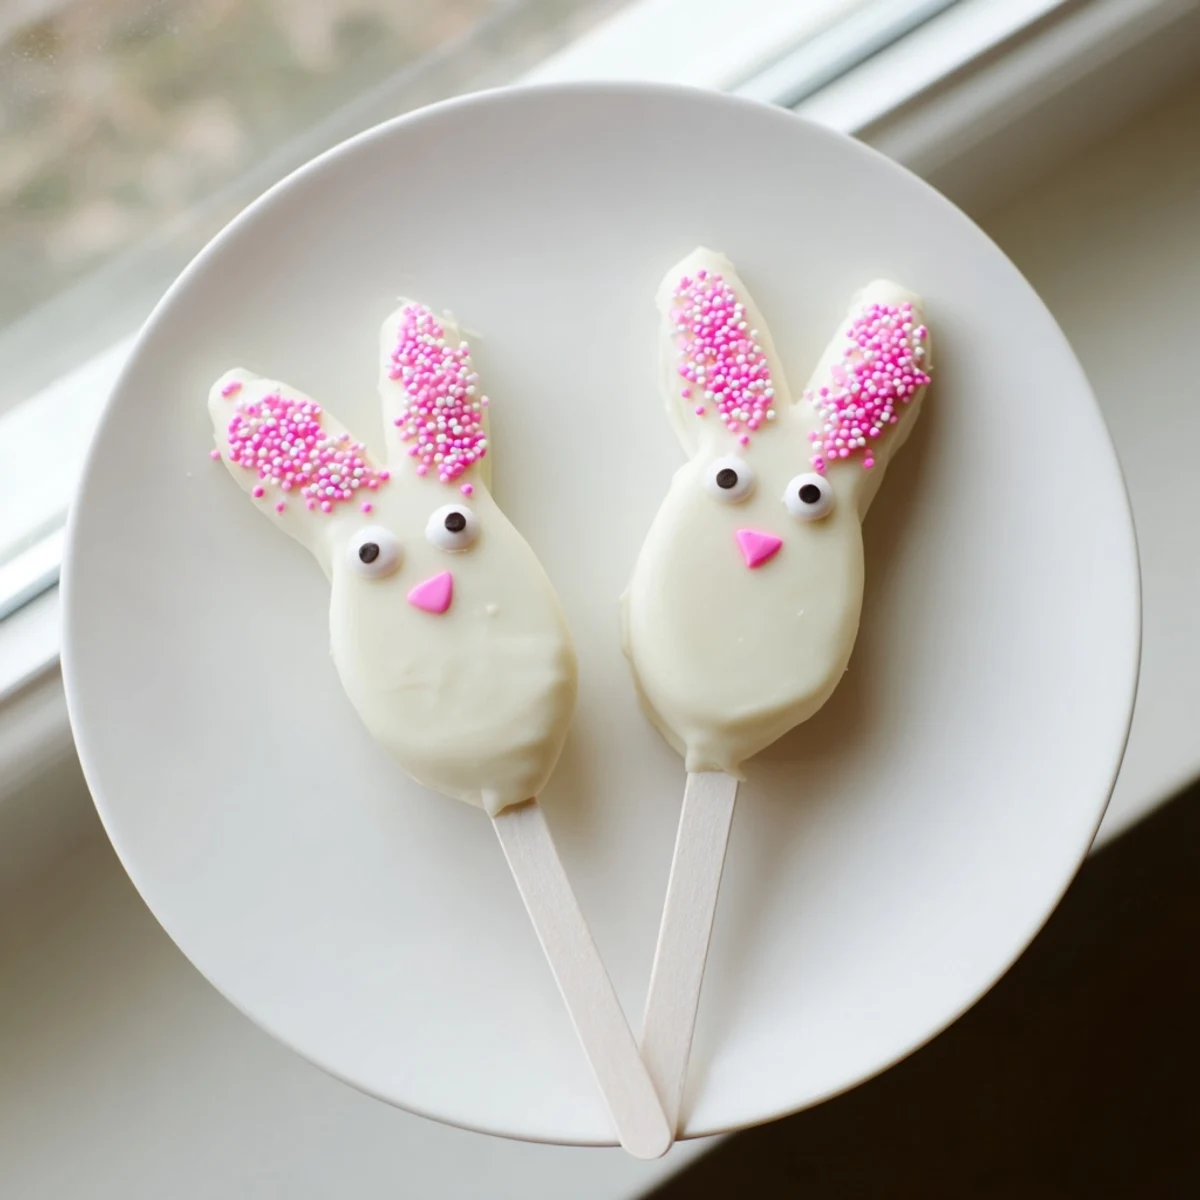
 Transform simple vanilla cake crumbs into adorable bunny-shaped treats perfect for Easter celebrations. These handheld desserts combine moist cake interiors with creamy white chocolate coating, creating festive sweets that both children and adults will love. The process involves mixing cake crumbs with cream cheese and butter, shaping them into bunny faces, then dipping them in melted white chocolate. Decorate with candy eyes, sprinkles, or fondant ears to bring your bunnies to life. The result is an impressive yet easy-to-make treat that adds whimsical charm to any spring gathering.
My kitchen counter looked like a pastel explosion last Easter when I decided cakesicles would be the perfect project for my niece and nephew. The marshmallow fluff incident of 2019 taught me that simpler projects with kids often yield better memories, so these white chocolate bunny cakesicles became our new tradition. They shaped the faces, I handled the melted chocolate, and we ended up with perfectly imperfect treats that disappeared faster than we could photograph them.
Last year I made three dozen for a brunch and watched grown adults fight over the last one with pink ears. Something about food on a stick makes everything taste better, and the white chocolate coating keeps them surprisingly stable even at room temperature.
Ingredients
- Vanilla cake crumbs: I save cake scraps from birthday cakes in the freezer specifically for recipes like this, but boxed cupcakes work beautifully too
- Cream cheese: Room temperature is non-negotiable here, or you will end up with lumpy mixture that falls off the sticks
- Unsalted butter: Adds richness without making the filling too soft to hold its shape
- Powdered sugar: Just enough to sweeten the cake mixture and help bind everything together
- Vanilla extract: Pure vanilla makes a noticeable difference in the filling flavor
- White chocolate: Candy melts are easier to work with, but good white chocolate tastes infinitely better
- Edible gel food coloring: Liquid coloring will seize your chocolate, so stick to gel or oil-based options
- Cakesicle sticks: Paper straws work too if you cannot find the actual sticks
- Sprinkles and decorations: Candy eyes are the one thing that makes these instantly recognizable as bunnies
Instructions
- Mix the cake filling:
- Combine cake crumbs, cream cheese, butter, powdered sugar, and vanilla in a medium bowl. The mixture should hold together when squeezed but not feel sticky or wet.
- Shape the bunny faces:
- Divide into eight portions and flatten into ovals slightly wider at the top for ears. The mixture should feel like play dough that holds its shape without cracking.
- Add the sticks:
- Insert a cakesicle stick about halfway into each shape, pressing gently to secure. Chill for 20 to 30 minutes until firm to the touch.
- Melt the coating:
- Melt white chocolate in 30-second bursts, stirring between each interval. The chocolate should be fluid like heavy cream for the smoothest coating.
- Dip and tap:
- Dip each cake pop into the chocolate, allowing excess to drip off. Tap gently against the bowl edge to remove bubbles and excess coating.
- Decorate immediately:
- Add candy eyes, fondant ears, and sprinkles while the chocolate is still soft. Work quickly because white chocolate sets faster than you expect.
- Set completely:
- Let cakesicles stand at room temperature for 20 minutes or refrigerate for 10. The coating should be dry to the touch before storing or serving.
 Pin it
 These became the most requested item at every gathering last spring. Something about eating dessert on a stick brings out the inner child in everyone, even the grumpy uncle who usually claims he does not like sweets.
Making Ahead
The cake filling can be shaped and frozen for up to a month before dipping. Thaw in the refrigerator overnight before coating with chocolate.
Coating Troubles
If your chocolate seizes and becomes grainy, whisk in a teaspoon of vegetable oil to smooth it out. Never add water or any liquid ingredient to seized chocolate.
Decorating Ideas
Pastel swirls, drizzled milk chocolate, or crushed vanilla wafers for texture all look beautiful on these. The key is working quickly once the cakesicle leaves the chocolate bowl.
- Set up your decorating station before you start dipping so everything is within reach
- Keep a toothpick handy for repositioning candy eyes that slide out of place
- Less is often more with sprinkles, especially if you want the bunny shape to remain recognizable
 Pin it
 Hope these bring as much joy to your Easter table as they have to ours. Happy dipping.
Recipe FAQs
- → How long do these treats stay fresh?
-
Store in an airtight container in the refrigerator for up to 3 days. The cool temperature helps maintain the texture of both the cake center and chocolate coating.
- → Can I use different cake flavors?
-
Absolutely! Chocolate, lemon, red velvet, or funfetti cake crumbs work wonderfully. Just ensure the crumbs are finely crushed for easy shaping.
- → What if I don't have a cakesicle mold?
-
No problem! Shape the mixture by hand into flattened ovals or bunny faces. The dough-like consistency holds together well for free-form shaping.
- → How do I prevent the sticks from falling out?
-
Refrigerate the shaped cakes for 20-30 minutes before dipping. Chilling firms the mixture, helping sticks stay secure during the coating process.
- → Can I make these ahead of time?
-
Yes! Prepare and decorate up to 2 days in advance. Store layered between parchment paper in the refrigerator to prevent sticking.
- → What alternatives work for bunny ears?
-
Fondant, modeling chocolate, or even pretzel sticks make excellent ears. For a simpler approach, use edible food coloring pens to draw ears directly on the coating.
