 Pin it
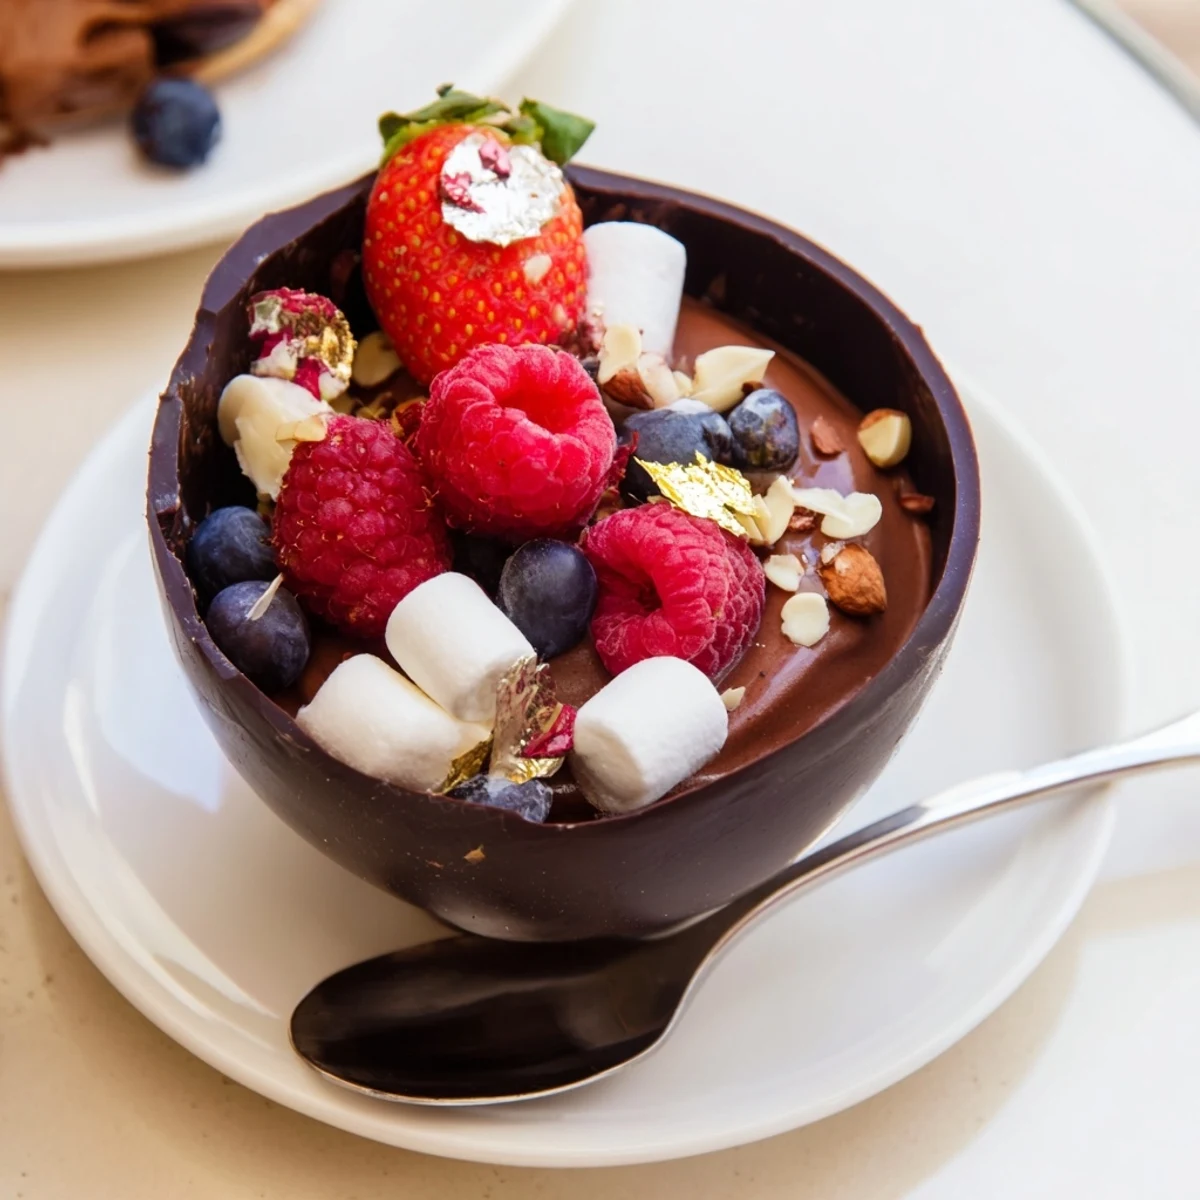
 Create stunning edible cups from melted dark chocolate filled with silky chocolate mousse. These decadent grazing cups combine the richness of dark chocolate with the brightness of fresh berries and satisfying crunch from nuts and marshmallows. Perfect for dessert tables, parties, or special celebrations.
The afternoon sun hit my dining room table just right when I first attempted these chocolate cups. I was hosting a last minute dinner party and needed something impressive that would not keep me in the kitchen all night. The moment my guests bit through that crisp chocolate shell into the silky mousse, the entire table went quiet.
Last Valentine Day I made a batch for my husband who swore he did not even like chocolate desserts. He ate three cups then spent the next week asking when I would make them again. Now they are our go to celebration dessert for everything from promotions to Tuesdays that need a little sparkle.
Ingredients
- Dark chocolate: The quality here matters completely since chocolate is the star of the show. I have learned that 60% to 70% cocoa gives the perfect balance between sweetness and that sophisticated edge that keeps these from feeling like childhood candy.
- Heavy cream: Very cold cream whips up faster and holds those delicate air bubbles better. I stick my bowl and whisk in the freezer for ten minutes before starting.
- Fresh berries: Use whatever looks most vibrant at the market. The tartness cuts through all that rich chocolate and makes each cup feel balanced.
- Chopped nuts: Toast them lightly in a dry pan for two minutes first. That extra warmth brings out oils and makes their crunch echo against the smooth mousse.
Instructions
- Craft the chocolate cups:
- Melt the chocolate in thirty second bursts, stirring between each one until glossy and smooth. Paint the inside of your liners with a pastry brush, working quickly so the chocolate stays fluid. Let them chill until they make a satisfying thud when tapped.
- Whip up clouds of mousse:
- Melt the remaining chocolate and let it cool to body temperature so it will not seize when you fold it in. Whip your cream until it barely holds a soft peak, then gently marry the two together with a spatula.
- Build your masterpiece:
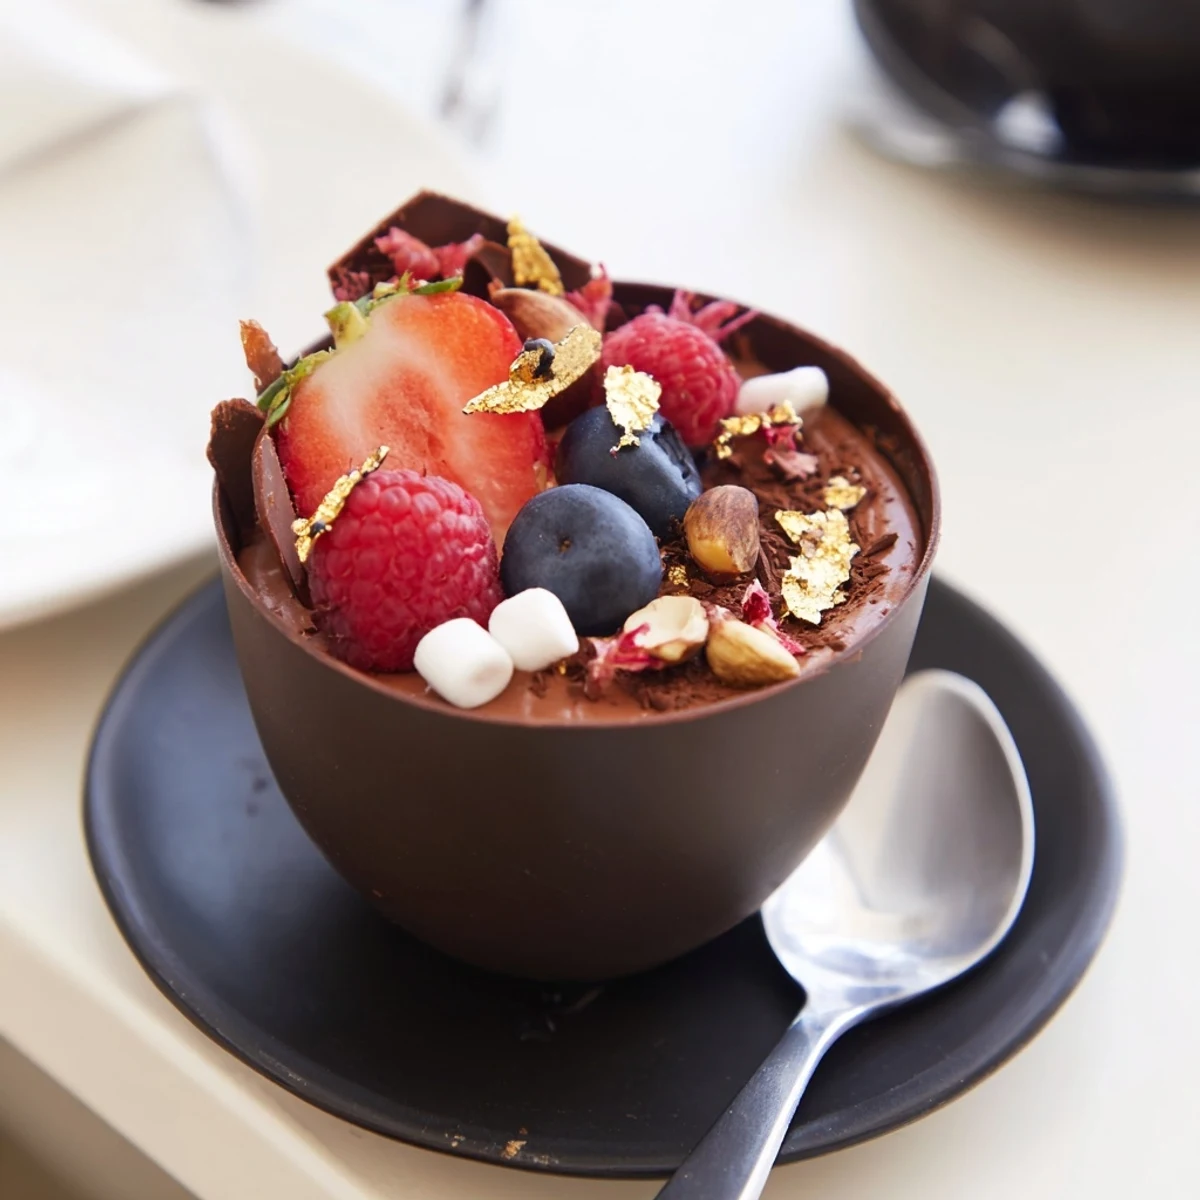
- Pipe or spoon the mousse into each chocolate cup, leaving room at the top for your toppings. Scatter berries, nuts, marshmallows, and chocolate curls like you are decorating a tiny edible crown.
 Pin it
 My daughter helped me assemble a batch for her birthday and took such pride in arranging each topping. She said it felt like playing with food but fancier. The best part was watching her friends reactions when they realized the whole cup was edible.
Make Ahead Magic
You can prepare both the cups and mousse a day in advance, but keep them separate until a few hours before serving. The moisture from the mousse will eventually soften the chocolate shell if they sit together too long. I learned this the hard way before a dinner party where my cups had turned into bowls by dessert time.
Flavor Variations
White chocolate cups with raspberry mousse became a summer staple after I experimented during berry season. For autumn, I use milk chocolate cups and fold cinnamon into the mousse. The template stays the same but the personality changes completely.
Serving Suggestions
Place each cup on a small dessert plate with a tiny fork, or arrange them on a grazing board with extra berries and nuts scattered around. They photograph beautifully in natural light if you want to capture them before they disappear.
- Let the cups sit at room temperature for five minutes before serving so the chocolate softens slightly
- Have extra toppings available because guests will inevitably want to customize
- Pair with espresso or a dessert wine that will not compete with the chocolate
 Pin it
 There is something deeply satisfying about eating an entirely edible dessert. No spoon traces, no abandoned wrapper, just pure indulgence from first bite to last.
Recipe FAQs
- → How far in advance can I make these chocolate cups?
-
Best made on the day of serving for optimal texture. Chocolate cups and mousse can be prepared separately up to 24 hours ahead, then assembled shortly before serving.
- → Can I use different types of chocolate?
-
Absolutely. White or milk chocolate work beautifully for both cups and mousse. Keep in mind that white chocolate sets softer, so chill thoroughly before removing liners.
- → What if I don't have silicone liners?
-
Paper cupcake liners work perfectly well. For reusable options, small silicone molds or even plastic shot glasses can be used as forms. Just ensure they're food-safe and can withstand chilling.
- → How do I store leftover cups?
-
Store assembled cups in an airtight container in the refrigerator for up to 2 days. Note that fresh berries may release moisture over time, so add them just before serving if possible.
- → Can I make these without alcohol for the mousse variation?
-
Yes, simply skip the orange liqueur. The mousse is delicious on its own, or try adding orange zest, coffee extract, or a splash of vanilla for different flavor profiles.
