 Pin it
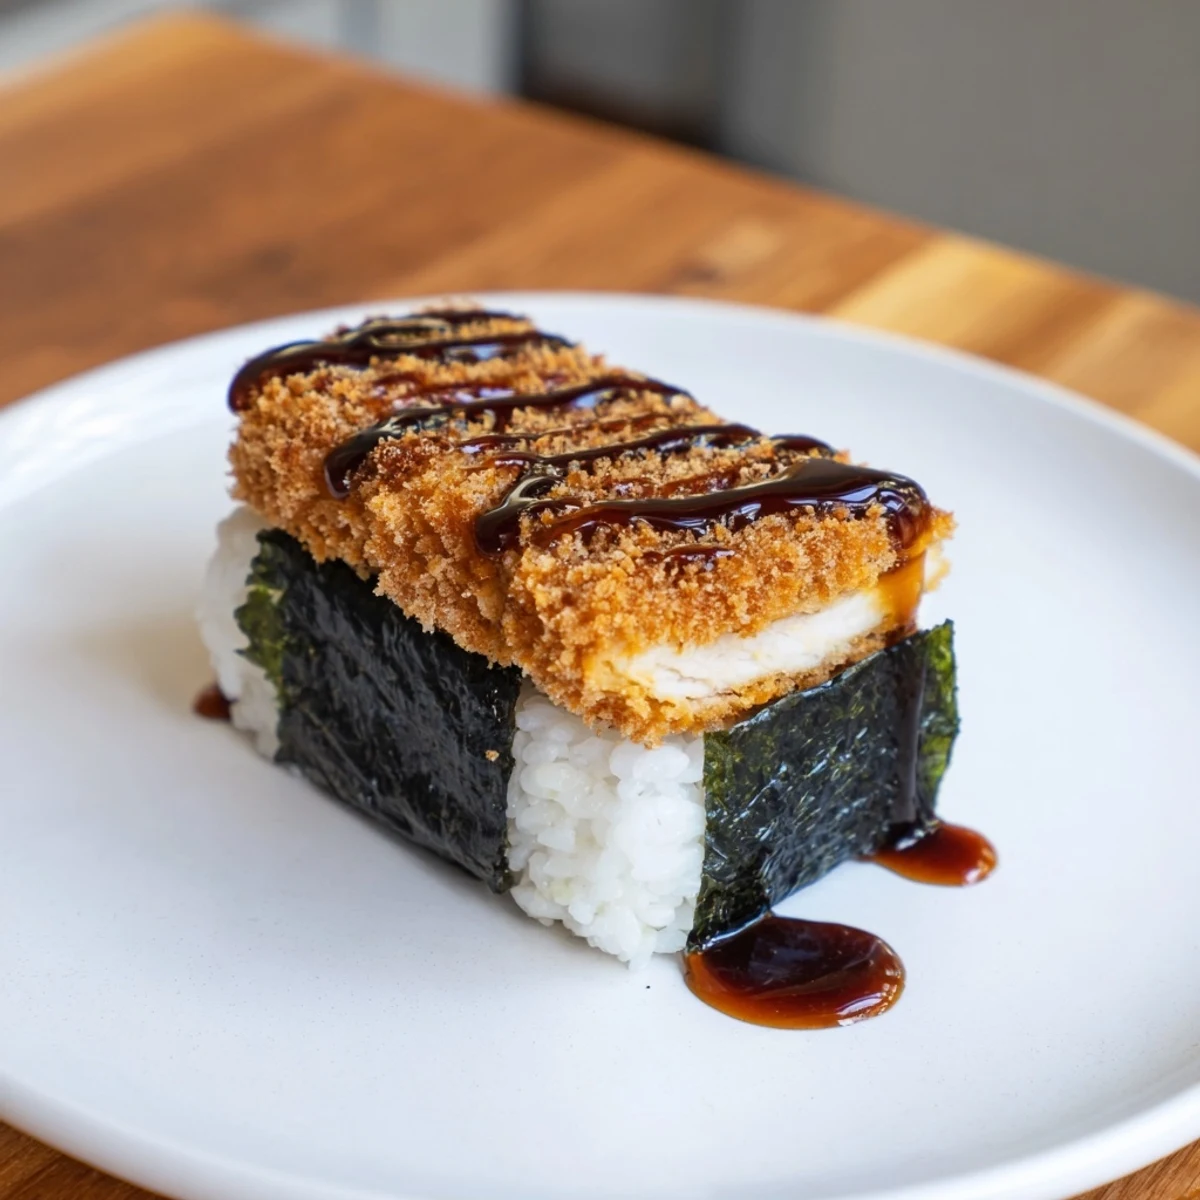
 These musubi combine golden, panko-crusted chicken thighs with vinegared Japanese rice and a sweet-savory tonkatsu blend. Each handheld bundle gets wrapped in roasted nori, creating layers of texture—from crunchy exterior to tender, juicy meat inside.
The preparation involves pounding chicken thin, coating in flour, egg wash, and panko, then frying until perfectly crisp. Meanwhile, warm rice gets seasoned with vinegar, sugar, and salt. Assembly layers rice, chicken strips, sauce, and more rice before the nori wrap seals everything together.
Double-frying guarantees extra crunch, while furikake adds savory depth. These musubi travel well for packed lunches or picnics, staying satisfying whether eaten fresh or at room temperature.
The first time I bit into a chicken katsu musubi at a beach park in Waikiki, I couldn't believe how perfectly crispy chicken and warm rice could taste together. The nori wrapped everything up like a little present, and I found myself going back to that same food truck three days in a row. Eventually I had to learn how to make them at home, and now my family requests these for every beach day and road trip.
Last summer, I made a batch of these for my daughter's soccer team tournament, and they disappeared before I could even grab one for myself. The other parents kept asking for the recipe, and one mom confessed she ate two in the car on the way home. Now whenever there's a potluck or picnic, I get at least three texts asking if I'm bringing those chicken musubi things.
Ingredients
- 2 boneless skinless chicken thighs: Thighs stay juicier than breasts, especially after frying
- 1/2 teaspoon salt and 1/4 teaspoon black pepper: Simple seasoning that lets the chicken shine
- 1/2 cup all-purpose flour: Creates the first layer of coating for the breading to stick
- 1 large egg and 1 tablespoon milk: The egg wash helps the panko adhere perfectly
- 1 cup panko breadcrumbs: Japanese breadcrumbs give you that signature extra-crispy texture
- Vegetable oil: You need about half an inch in the pan for shallow frying
- 2 cups cooked short-grain Japanese rice: Use warm rice for easier shaping and better flavor
- 1 tablespoon rice vinegar, 1/2 teaspoon sugar and salt: This simple seasoning transforms plain rice
- 2 tablespoons tonkatsu sauce: The base of our delicious musubi sauce
- 1 tablespoon soy sauce: Adds depth and umami to the sauce
- 1 teaspoon honey: Balances the savory elements with subtle sweetness
- 4 sheets nori dried seaweed: Cut these in half before you start assembling
- Furikake optional: A sprinkle between rice layers adds extra flavor and crunch
Instructions
- Prepare the Chicken Katsu:
- Pound those chicken thighs to even thickness so they cook uniformly and fit perfectly in your musubi. Season generously with salt and pepper on both sides.
- Create the Breading Station:
- Set up three shallow bowls with flour, beaten egg mixed with milk, and panko breadcrumbs. Dredge each thigh in flour, dip in egg, then press firmly into panko.
- Fry the Chicken:
- Heat about half an inch of oil in a skillet over medium heat. Fry chicken for 3 to 4 minutes per side until golden brown and cooked through, then drain on paper towels.
- Season the Rice:
- Mix rice vinegar, sugar, and salt until dissolved, then gently fold into warm rice. Let it cool slightly so it's easier to handle.
- Make the Sauce:
- Whisk together tonkatsu sauce, soy sauce, and honey in a small bowl until smooth. This will be the secret that ties everything together.
- Start Assembling:
- Lay plastic wrap on your work surface and place a halved nori sheet shiny side down. Wet your hands and press about 1/4 cup rice into a rectangle in the center.
- Add the Filling:
- Sprinkle with furikake if using, then top with sliced chicken katsu. Drizzle with a little sauce and add another thin layer of rice on top.
- Wrap It Up:
- Use the plastic wrap to fold the nori tightly around the filling, pressing gently to compress everything into a neat rectangle. Let rest for 2 to 3 minutes so the nori softens.
 Pin it
 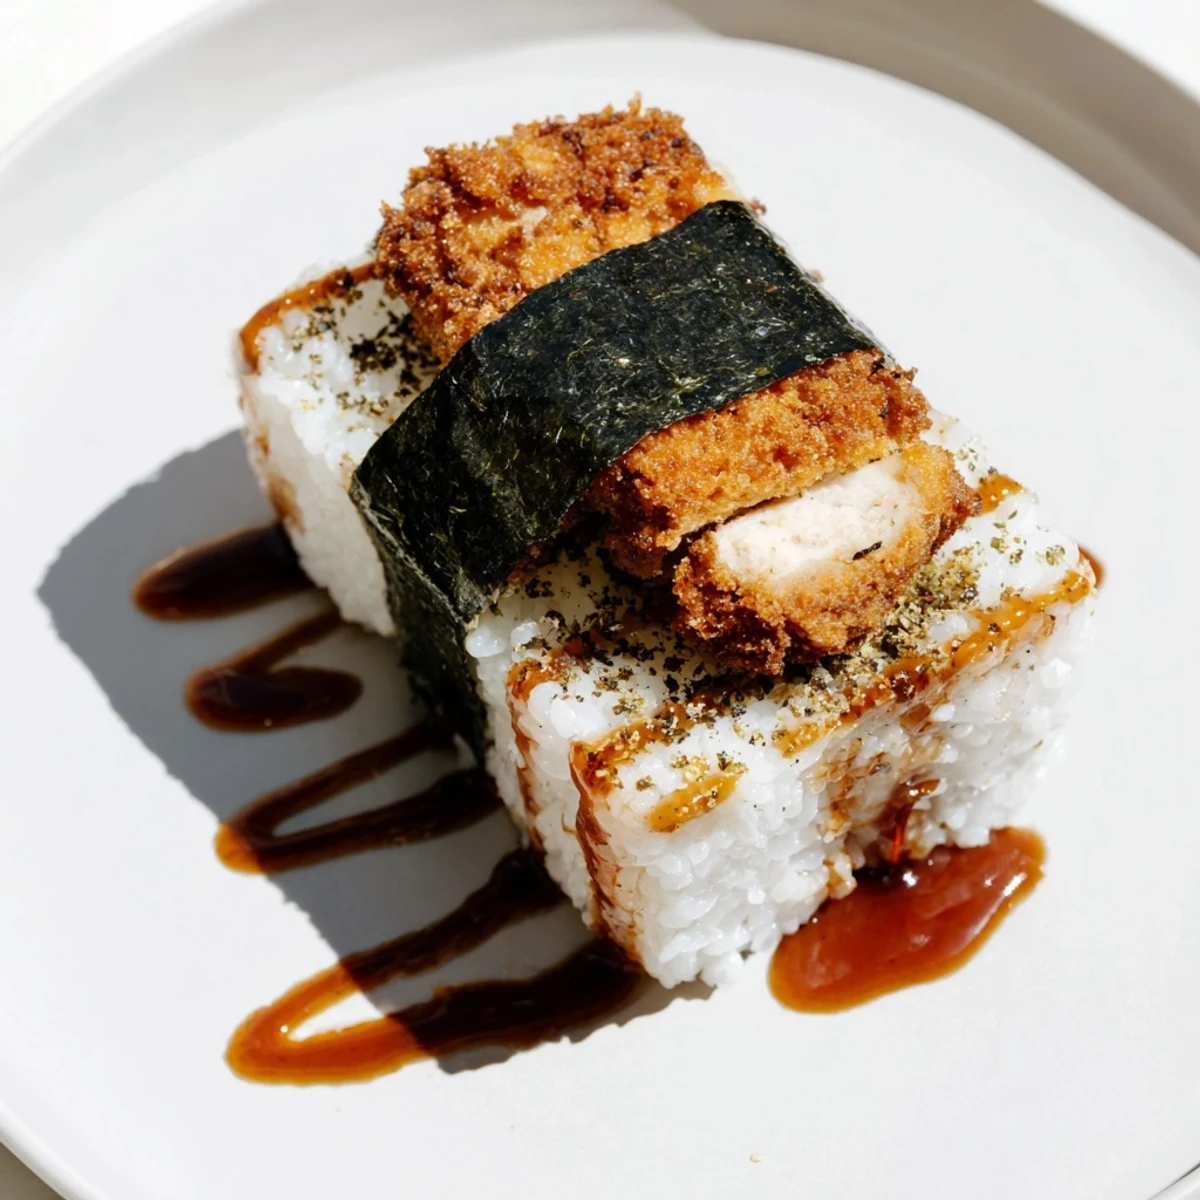 Pin it
 My friend from college visits once a year, and we always spend an afternoon making musubi together while catching up on life. We've developed this little assembly line where she handles the rice while I manage the chicken, and somehow we always end up eating as many as we pack. It's become one of my favorite traditions.
Getting the Rice Right
Short-grain rice is non-negotiable here because it sticks together perfectly. I've tried using medium-grain in a pinch, and the musubi just falls apart when you try to wrap it. Make sure the rice is warm but not hot when you're shaping it, and keep a bowl of water nearby to dip your hands in between pieces.
Mastering the Fry
The key to restaurant-quality chicken katsu is maintaining your oil temperature. If it's too low, the breading gets soggy, and if it's too hot, the outside burns before the chicken cooks through. I keep a thermometer in the pan and aim for 350 degrees, but you can test by dropping in a single panko crumb, it should sizzle immediately.
Assembly Shortcuts and Tips
If you're making these for a crowd, consider batching the components in advance. You can fry the chicken and make the sauce the day before, then just reheat the chicken gently while you assemble. The musubi holds up beautifully for a few hours at room temperature, making it ideal for parties and picnics.
- Invest in a musubi press if you plan to make these regularly, it makes shaping so much faster
- Double-fry the chicken for extra crunch, fry once at 325 then again at 375 for maximum crispiness
- Wrap assembled musubi in plastic wrap individually if packing for lunch or storing
 Pin it
 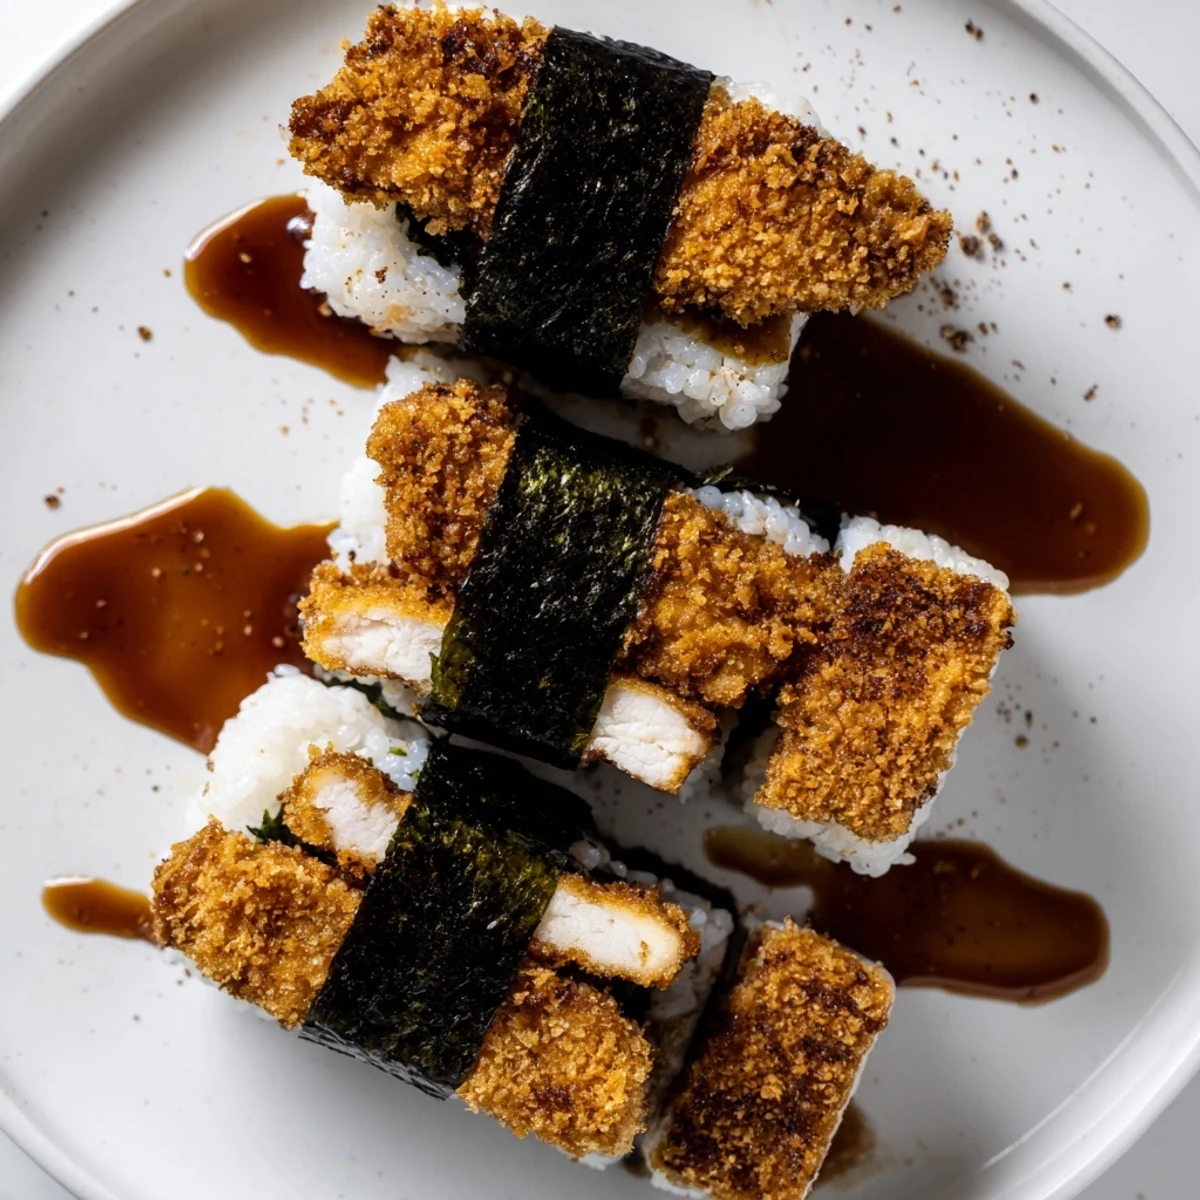 Pin it
 There's something deeply satisfying about biting into a perfectly constructed musubi, the crunch of chicken, the softness of rice, and the briny nori all coming together in one handheld package. I hope these become a regular part of your cooking rotation, just like they have in mine.
Recipe FAQs
- → What makes musubi different from sushi?
-
Musubi uses pressed, seasoned rice formed into blocks or ovals rather than hand-rolled sushi rice. The fillings sit between rice layers rather than being rolled inside, and nori wraps around the exterior rather than enclosing the filling from all sides.
- → Can I make these ahead of time?
-
Yes, musubi travels exceptionally well. Wrap each piece tightly in plastic wrap after assembly and store refrigerated for up to 24 hours. The nori will soften slightly but still hold its shape. Bring to room temperature before serving for best texture.
- → What's the best way to reheat leftover musubi?
-
Avoid microwaving as it makes the chicken soggy. Instead, unwrap the musubi and warm in a 350°F oven or air fryer for 5-8 minutes to recrisp the panko coating. Alternatively, enjoy cold or at room temperature—these are designed to be eaten without reheating.
- → Can I use brown rice instead of white?
-
Brown rice works but changes the texture significantly. Short-grain brown rice holds together better than long-grain varieties. Expect a nuttier flavor and heartier texture that complements the crispy chicken. Adjust vinegar seasoning as brown rice absorbs flavors differently.
- → What can I substitute for tonkatsu sauce?
-
Mix equal parts ketchup, Worcestershire sauce, and oyster sauce with a dash of soy sauce. Alternatively, use bulldog sauce or create a simple blend of barbecue sauce diluted with vinegar and soy. The key is balancing sweet, tangy, and savory elements.
- → Why double-frying the chicken?
-
The first fry cooks the meat through, while the second fry, done at slightly higher heat for just 1-2 minutes, crisps the panko coating to maximum crunch. This technique ensures the chicken stays juicy inside while achieving that signature shatteringly crisp exterior.
