 Pin it
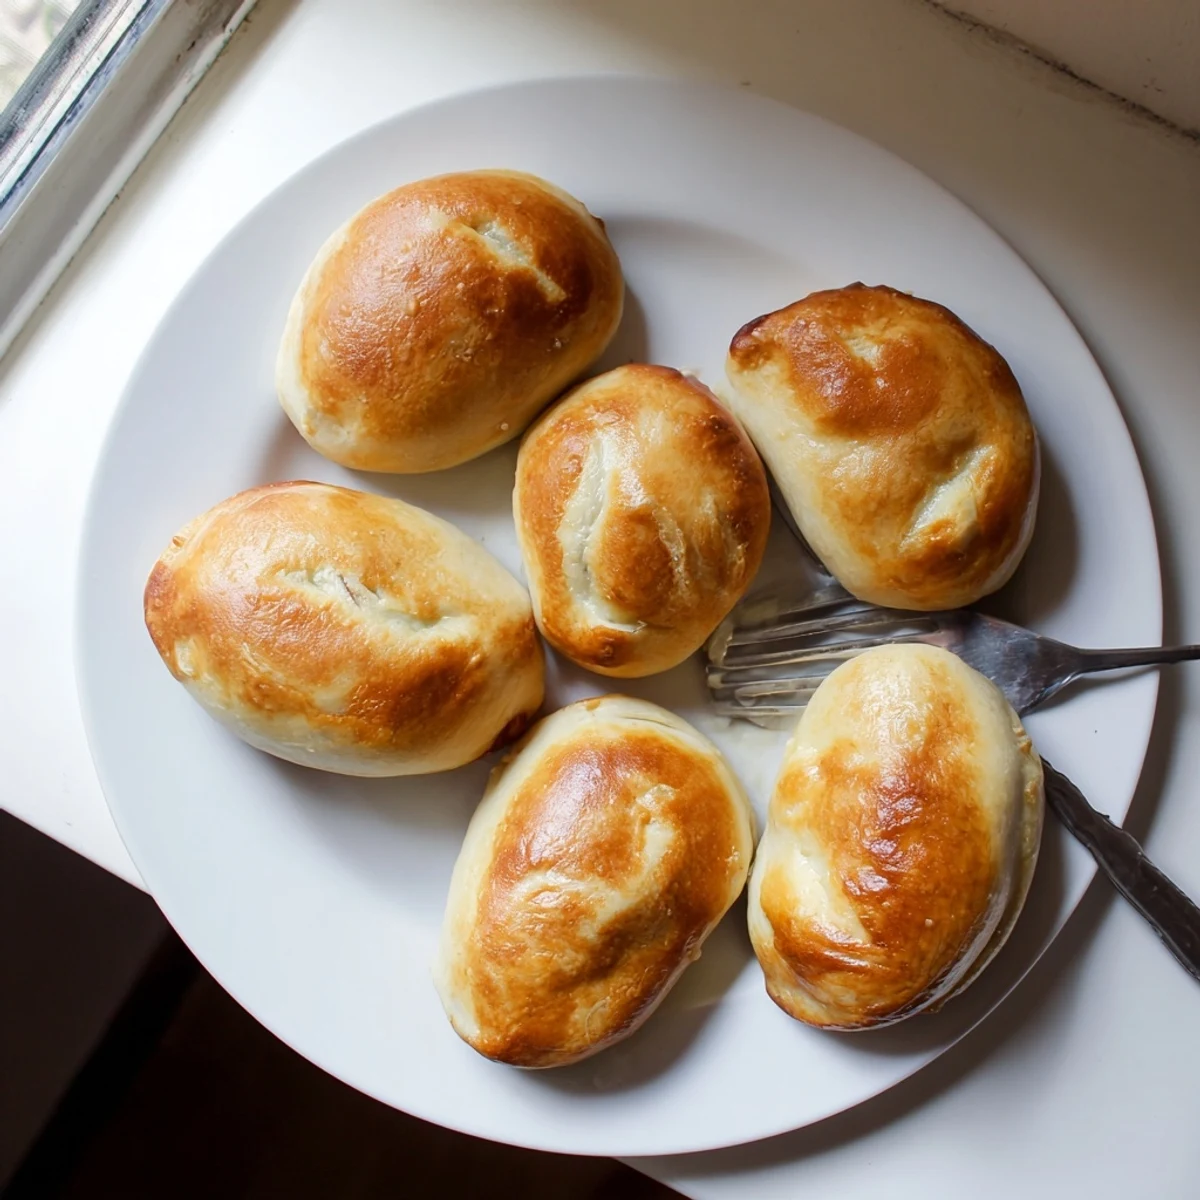
 These soft, golden Eastern European pastries feature a tender yeast dough wrapped around a savory filling of hard-boiled eggs, mozzarella, and feta cheese. Fresh dill and green onions add brightness, while a simple egg wash creates that beautiful golden finish. Each batch yields twelve handheld treats, ideal for snacking, light meals, or entertaining guests.
There was this tiny Russian bakery in my college town that made piroshki every Friday morning. I would time my walk to class just to catch them coming out of the oven, still warm and golden, wrapped in crinkly paper. The owner would laugh when she saw me coming, already reaching for the bag. It took me years to recreate that perfect tender dough at home, and now my apartment fills with that same buttery yeast smell.
Last winter my sister came over during a snowstorm and we made sixty of these together. We had flour everywhere, dough rising in every warm corner of the kitchen, and old Russian folk music playing on repeat. By the time we finished, we had eaten more than we baked and could not stop laughing at our flour-covered faces.
Ingredients
- All-purpose flour: This creates the perfect structure for pillowy soft pastries that hold their shape
- Warm milk: Should feel like bath temperature to activate the yeast without killing it
- Active dry yeast: Give it ten minutes to get foamy before moving on, this proves it is alive and ready
- Sugar: Feeds the yeast and adds just a hint of sweetness to balance the savory filling
- Salt: Enhances all the flavors and keeps the yeast growth in check
- Unsalted butter: Melt it completely so it incorporates evenly into the dough
- Large egg: Adds richness and helps the dough achieve that beautiful golden color
- Hard-boiled eggs: Chop them into small pieces so the filling stays evenly distributed
- Mozzarella cheese: Creates those amazing cheese pulls when you bite into a warm piroshki
- Feta cheese: Brings a salty tang that cuts through the richness of the other ingredients
- Fresh dill: This herb is non-negotiable for authentic Eastern European flavor
- Green onions: Add a mild bite that complements the creamy cheese mixture
- Ground black pepper: Freshly cracked gives the best aromatic punch
- Beaten egg for brushing: This is what creates that gorgeous shiny bakery-style finish
Instructions
- Wake up the yeast:
- Dissolve sugar in warm milk and sprinkle yeast on top, then walk away for ten minutes until you see a foamy layer form on the surface
- Mix the dough:
- Combine flour and salt in a large bowl, then pour in melted butter, one egg, and that bubbly yeast mixture, stirring until everything comes together into a shaggy ball
- Knead until smooth:
- Turn the dough onto a floured surface and work it for eight minutes until it feels like a baby cheek, then place it in a greased bowl and cover it with a warm towel
- Let it rise:
- Find a cozy spot for the bowl and let the dough do its thing for about an hour, watching it balloon to twice its size
- Make the filling:
- While dough rises, chop those hard-boiled eggs into small pieces and toss them with both cheeses, dill, green onions, pepper, and salt until well combined
- Preheat and prep:
- Heat your oven to 375°F and line a baking sheet with parchment paper so nothing sticks
- Divide the dough:
- Punch down the risen dough gently and cut it into twelve equal pieces, rolling each into a smooth ball
- Fill and shape:
- Roll each ball into a four-inch circle, scoop two tablespoons of filling into the center, then fold the dough over and pinch the edges tightly shut
- Egg wash and bake:
- Brush each pastry with beaten egg, place them seam-side down on the baking sheet, and bake for twenty to twenty-five minutes until they turn golden brown
 Pin it
 My friend Anna finally tried one after I brought a batch to a potluck, and she immediately asked for the recipe. Now she makes them every Sunday for her family, and her kids actually beg for more vegetables just so they can have piroshki for dinner.
Making The Dough Your Own
Some days I add a tablespoon of sour cream to the dough for extra tenderness, especially in winter when I want something richer. You can also replace half the milk with buttermilk for a slight tang that pairs beautifully with the cheese filling.
Filling Variations
While the classic egg and cheese combination is hard to beat, I have experimented with mashed potatoes mixed with caramelized onions, sautéed cabbage with mushrooms, and even a spiced meat version. The dough is like a blank canvas that works with almost anything you have on hand.
Serving Suggestions
These piroshki are perfect on their own but become something special with a few simple additions. A bowl of cold sour cream makes an excellent dipping sauce, and a crisp cucumber salad with vinegar and dill cuts through the richness.
- Serve them warm for the best cheese pull experience
- Pack them in lunchboxes because they taste great at room temperature
- Make a double batch because they disappear faster than expected
 Pin it
 There is something deeply satisfying about pulling a tray of these from the oven, golden and gleaming, and watching everyone reach for one at the same time. Food this good is meant to be shared.
Recipe FAQs
- → Can I make the dough ahead of time?
-
Yes, prepare the dough and let it rise as instructed, then refrigerate for up to 24 hours. Bring to room temperature before shaping and filling.
- → What other cheeses work well in the filling?
-
Sharp cheddar, Swiss, or cottage cheese can replace or complement the mozzarella and feta blend. Adjust quantities to maintain proper filling consistency.
- → How should I store leftover piroshki?
-
Keep in an airtight container in the refrigerator for 3-4 days. Reheat in a 350°F oven for 5-7 minutes to restore crispness, or microwave briefly for softer results.
- → Can I freeze these pastries?
-
Absolutely. Freeze unbaked pastries on a baking sheet, then transfer to freezer bags. Bake from frozen, adding 5-10 minutes to cooking time. Baked ones freeze well too.
- → What's the best way to seal the edges?
-
Use firm pressure with your fingers to pinch edges together, then crimp with a fork for extra security. Ensure edges are clean and dry before sealing for best results.
- → Can I use whole wheat flour?
-
Substitute up to half the all-purpose flour with whole wheat. The texture will be denser and slightly nuttier, but still delicious. Adjust liquid if dough feels too dry.
